


Fixing the micro-ROS parameter server on my robot has been on my mind for a long time, but I got quite busy working on other things like setting up a visualization in Unity (I still have some issues to fix here, and I will hopefully write a post about this next week). I now find myself with some extra time, so let's fix the parameter server once and for all.
For context, when I first tried compiling the micro-ROS firmware written for Galactic, with micro-ROS Humble, I got a lot of errors, especially with the parameter server. Then I realized that the parameter server is defined and initialized differently in micro-ROS Humble as compared to Galactic, and I ended up commenting out all the parameter server bits just to make the rest of the code work.
Setting up the Parameter Server
First I started by including the necessary library, and defining the parameter server:
#include <rclc_parameter/rclc_parameter.h>

rclc_parameter_server_t parameter_server;
Next, I updated the createEntities() function, where I created and initialized the parameter server with options:
// create parameter server
rclc_parameter_options_t param_options = {
.notify_changed_over_dds = true,
.max_params = 4,
.allow_undeclared_parameters = false,
.low_mem_mode = true};
RCCHECK(rclc_parameter_server_init_with_option(
¶m_server,
&node,
¶m_options));
So far, the implementation has been identical to the micro-ROS Galactic firmware, except for the param_options configuration. I decided to set the allow_undeclared_parameters option to false, as I had no intention for any more parameters to be declared externally. I also set the low_mem_mode option to true. The low memory mode significantly reduces the memory used by the parameter server, and constrains the functionality such that only one parameter request (get, set, etc) can be handled at one time.
In my case, I plan on having 4 parameters - kp, ki, kd and scale, the first three representing the PID gains, and the last parameter representing the max RPM scale of the motors. I only plan on using these parameters for testing and tuning, and not during normal operation. So, I was quite fine with the reduced functionality because of the low memory mode.
Next, I updated the number of handles in the executor initialization function and added the parameter server to the executor. For Galactic, the number of handles required by the parameter server is defined by RCLC_PARAMETER_EXECUTOR_HANDLES_NUMBER which needs to be added to the number of handles required by the rest of the code. For Humble, however, the name of the variable has been changed to RCLC_EXECUTOR_PARAMETER_SERVER_HANDLES:
RCCHECK(rclc_executor_init(&executor, &support.context, RCLC_EXECUTOR_PARAMETER_SERVER_HANDLES+3, &allocator));
RCCHECK(rclc_executor_add_parameter_server(
&executor,
¶m_server,
paramCallback));
Next, I added the parameters to the server, and set them to their default values:
// Add parameters to the server
RCCHECK(rclc_add_parameter(¶m_server, kp_name, RCLC_PARAMETER_DOUBLE));
RCCHECK(rclc_add_parameter(¶m_server, ki_name, RCLC_PARAMETER_DOUBLE));
RCCHECK(rclc_add_parameter(¶m_server, kd_name, RCLC_PARAMETER_DOUBLE));
RCCHECK(rclc_add_parameter(¶m_server, rpm_ratio_name, RCLC_PARAMETER_DOUBLE));
// Set parameter default values
RCCHECK(rclc_parameter_set_double(¶m_server, kp_name, K_P));
RCCHECK(rclc_parameter_set_double(¶m_server, ki_name, K_I));
RCCHECK(rclc_parameter_set_double(¶m_server, kd_name, K_D));
RCCHECK(rclc_parameter_set_double(¶m_server, rpm_ratio_name, MAX_RPM_RATIO));
Next, in the destroyEntities() function, I added the function call to destroy the parameter server, which de-allocates any memory created on the microcontroller. It is important to note that since the parameter server is added to the executor, the executor should be destroyed first. So, the following line needs to be added after the rclc_executor_fini() function is called.
rc += rclc_parameter_server_fini(¶m_server, &node);
Finally, once the parameter server was correctly set up, I moved on to the callback function paramCallback which is defined earlier when adding the parameter server to the executor. This function is called every time a parameter in the server changes value.
This is where I struggled a bit. In Galactic, when a parameter was changed, I used the getter to get all four parameter values and set the RPM and the PID constants accordingly. However, this did not work in Humble for some reason (I did not investigate further), so I decided to follow the method described in the Parameter Server tutorial. The callback function in Humble has three parameters unlike Galactic (which only has one parameter - the changed value):
old_param: Old value of the parameter (NULLfor new parameter request, but in this case, undeclared parameters are not allowed, also the parameter values are already pre-defined).new_param: New value of the parameter, (NULLfor the parameter removal requests, however I've not tried removing a parameter yet).context: User context, configured onrclc_executor_add_parameter_server_with_context(In my case, no user context is configured)
bool paramCallback(const Parameter * old_param, const Parameter * new_param, void * context)
{
  if (old_param != NULL && new_param != NULL)
  {
    if(strcmp(new_param->name.data, rpm_ratio_name) == 0){ rpm_ratio = new_param->value.double_value; }
    else if(strcmp(new_param->name.data, kp_name) == 0){ kp = new_param->value.double_value; }
    else if(strcmp(new_param->name.data, ki_name) == 0){ ki = new_param->value.double_value; }
    else if(strcmp(new_param->name.data, kd_name) == 0){ kd = new_param->value.double_value; }

    kinematics.setMaxRPM(rpm_ratio);
    motor1_pid.updateConstants(kp, ki, kd);
    motor2_pid.updateConstants(kp, ki, kd);
    motor3_pid.updateConstants(kp, ki, kd);
    motor4_pid.updateConstants(kp, ki, kd);

    return true
  }
  else return false;
}
In the above code, I first make sure that the old parameter and the new parameter are not NULL. If this is OK, I check what parameter has changed and accordingly set the global variable (which has been pre-defined). Then I set the RPM and PID constants.
If either or both of the old and new parameters are NULL, I return false. I have no intention of supporting the addition of new parameters or the deletion of an existing parameter. By setting the allow_undeclared_parameters value to false earlier, I believe I cannot add any new parameters. I am not sure if I can delete a parameter though, or if I can disable this feature. For now, if I try, then I return false.
Testing the implementation
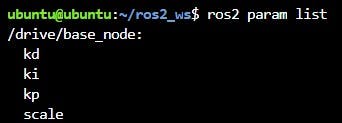
Finally, I was able to build the firmware on the Arduino IDE, and upload it to the Teensy. Trying it out the first time, and everything worked as expected. Once the micro-ROS agent was running OK, I was able to use the command line to list the parameters defined in the micro-ROS node:
Next, I was able to successfully set the parameter values and see the results by driving the robot around:

I also realized that I cannot declare new parameters from the command line in ROS 2, I can only load parameters from a YAML file. I was however able to try to delete a parameter, and this request was successfully rejected by the server:

With this, I was good to go. I do want to try it without the low memory mode, but I will leave that for another project, where I don't have so many publishers and subscribers.
Visualization update
On a side note, I have some updates when it comes to visualization, especially with Foxglove Studio. Earlier, I was publishing a MarkerArray message from the robot, so that I can visualize the robot's meshes on Foxglove Studio. I thought this was the only way of visualizing the URDF on a remote Foxglove Studio without having a local ROS 2 installation. Turns out I was wrong.
I found out that the meshes defined in a URDF do not have to be stored locally. Instead, an HTTPS URL can be used to define the mesh location. This updated URDF file can be stored locally on the computer running Foxglove Studio, and it should be able to load the meshes directly from the internet. This also works with RViz, but in both cases, the computer running RViz or Foxglove should be connected to the internet.
Another method is by adding a custom URDF layer in Foxglove's 3D panel. I can simply store my URDF and corresponding meshes in a GitHub repository and provide a URL to the URDF to Foxglove Studio. This also works quite well. I decided to use this option (for no particular reason). As a result, I can remove the mesh publisher node completely. I also don't need to publish the meshes from the robot anymore, as Foxglove Studio can simply load it from the internet (and this happens on the remote computer, not on the robot computer).

Next up
I have some interesting things coming up in my next post. I got started with Unity with ROS 2 Humble and I have already made some progress - I am now able to load and visualize the URDF in Unity, and also connect to the robot and visualize some topics.
I have some issues with the transforms, and I still haven't tried publishing messages from Unity. But before getting to that, I want to try out the Nav2 SLAM tutorial which uses Unity for simulation and visualization. This tutorial should give me some idea about how to figure out the issue with the transforms. I'll talk more about this in my next post.
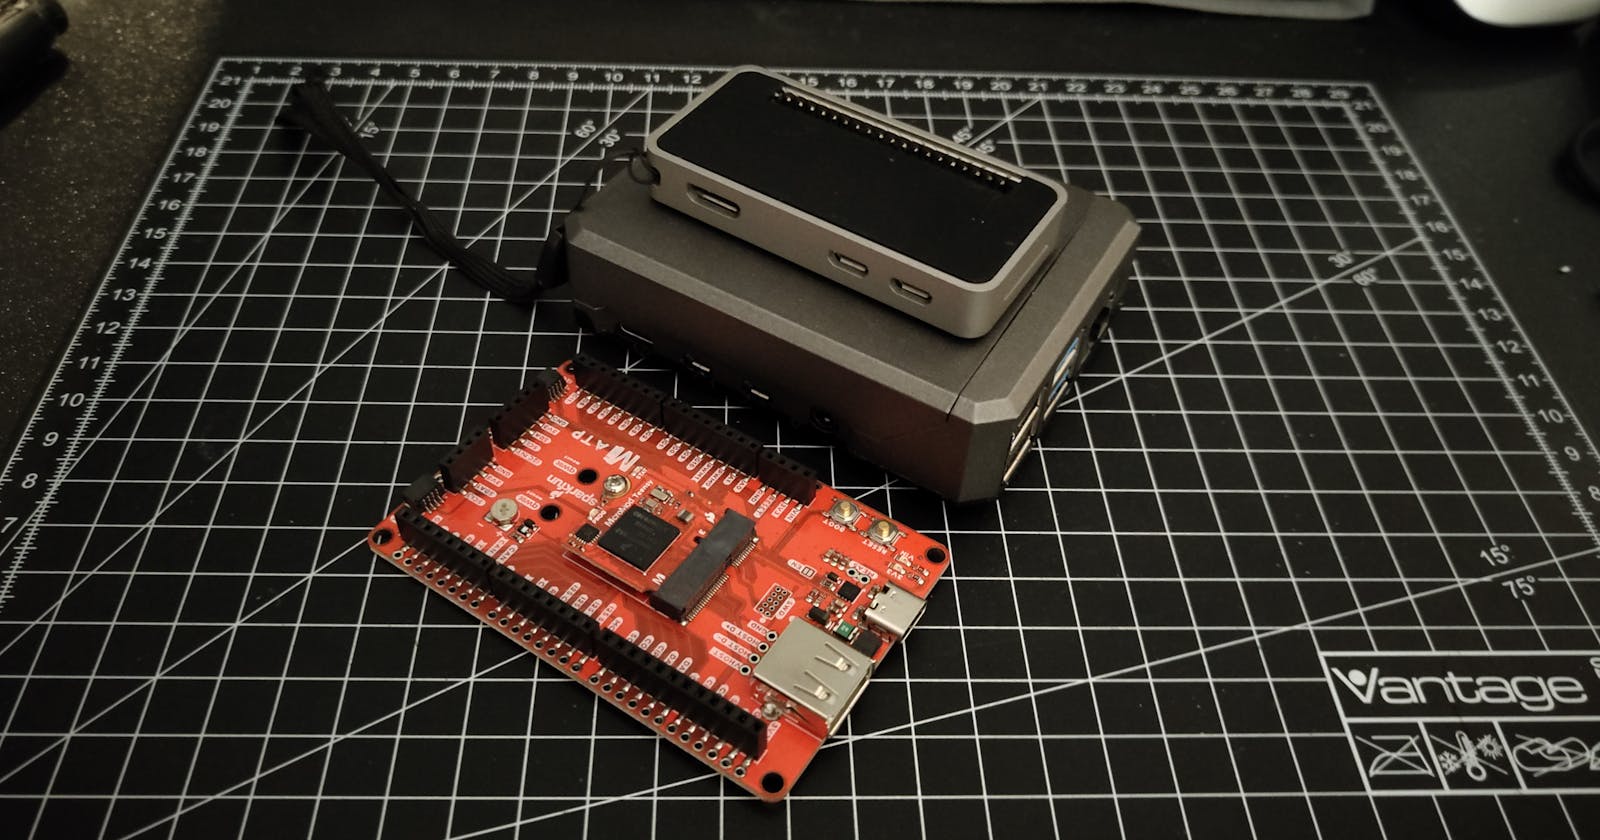
Other than this, some fun new toys arrived, which I have already started playing with. First, I received a package from Pimoroni a couple of weeks ago. It came with a Cosmic Unicorn LED matrix with an RPi Pico W onboard, a Teensy MicroMod, and a MicroMod carrier board.
The MicroMods are for this open-source project that I'm collaborating with. It is a robot kit that will use the Teensy MicroMod with micro-ROS support. I intend to try out some micro-ROS examples on the Teensy MicroMod before I receive a prototype board to play with. As for the Cosmic Unicorn, I've programmed it to display a lava lamp pattern and hung it up as a display.
The second thing I received is something that I've been searching for for the last two years - a Raspberry Pi Zero 2 W. I've found Raspberry Pi Zeros but never found a 2 W in stock. Luckily, thanks to RPilocator, I was able to find it in stock at a webshop in Belgium and placed an order immediately. And this week, it arrived:
I've already been able to install Ubuntu 22.04 and ROS 2 Humble on it and set it up for remote development (with a JupyterLab server). Since it is not a RPi 4, I decided to not install a desktop environment or the ROS 2 GUI tools. Speaking of RPi 4s, I also set up a second RPi 4 with the ROS 2 Humble + RT Kernel image and set it up just like the RPi 4 on the robot. The only difference is that this is the 4GB RAM version, the robot has the 8GB one. I plan on using it on the 3 wheeled robot I talked about last time (I do plan on working on it, and I also see a few public holidays and long weekends coming up where I can)
I also finished my book for March. Interesting read, but not very memorable. I got a little bored reading it, which is why it took more than a month.