
Steam Deck as a Robot Controller
Driving AKROS2 using a Steam Deck and ROS 2


I first saw the Steam Deck used as a robot controller during ROSCon 2022, where a some guys were driving around a robot dog using a Deck. Since then, I've been seeing a lot of other engineers using the Steam Deck as a robot controller. There have also been a few videos on YouTube by robotics creators like Articulated Robotics and A PolyHobbyist.
So, I decided to get myself one during the holidays. Fortunately, the prices for the LCD variants have been dropped as they are phasing them out in favor of the new OLED variants. I got the 64GB variant and added a 512GB SD card to it.
I first logged in and formatted the SD card to use it as storage. Then, I installed my games on the SD card, instead of the main Steam Deck memory. This is because I want to use the (limited) Steam Deck memory (~40GB from the 64GB, the rest is used for the OS) for installing robotics-related stuff. I played some games for a while and then switched to Desktop Mode to install ROS 2 Humble.
Installing ROS 2
The first thing I noticed in the Desktop Mode is that SteamOS, which is based on Arch Linux is quite different compared to Debian systems like Ubuntu. So, I couldn't install ROS the normal way. I had already read about RoboStack and watched some YouTube videos about it much before I decided to get the Steam Deck. It seemed like an easy and viable option to install ROS 2 on SteamOS, so I decided to start with it. A couple of people had also recommended using Distrobox on Twitter, so I wanted to try that as well.
Ubuntu SD Card
First there is another method to install ROS on the Steam Deck - to boot Ubuntu via an SD card and just install ROS the normal way. I chose not to go in this direction as I did not want to keep switching SD cards between games and ROS. So I proceed with my other two options: RoboStack and Distrobox.
RoboStack
My introduction to RoboStack was this video by the Polyhobbyist:
Using this video and the documentation, the installation was a breeze. I was able to use ROS 2 and the standard tools directly from Steam OS and even install some additional tools like Tailscale (using their documentation for Arch Linux) and Visual Studio Code (as a flatpak via the Discover Software Center). However, some tools are only available on the snap store, which I struggled to install on SteamOS. Also, a lot of Arch Linux was completely new to me, so I decided to give Distrobox with Ubuntu 22.04 a shot.

Distrobox
Distrobox is a software tool that creates containers of operating systems that can be launched from the terminal. Again, installing and getting started is quite easy - I used the handy guide for installing Distrobox on the Steam Deck. Note: this guide mentions updating the ~/.distroboxrc file, however, I could not find that, so I added it to ~/.bashrc instead, which surprisingly worked as expected.
I first created an Ubuntu 22.04 container and then entered it from my terminal. I was then able to install ROS 2 Humble and other standard ROS tools that I would need, on Ubuntu 22.04 using their Debian packages.
From within the container, using ROS 2 was straightforward. I was able to run nodes and launch files, and even use standard tools like RQt and RViz2:
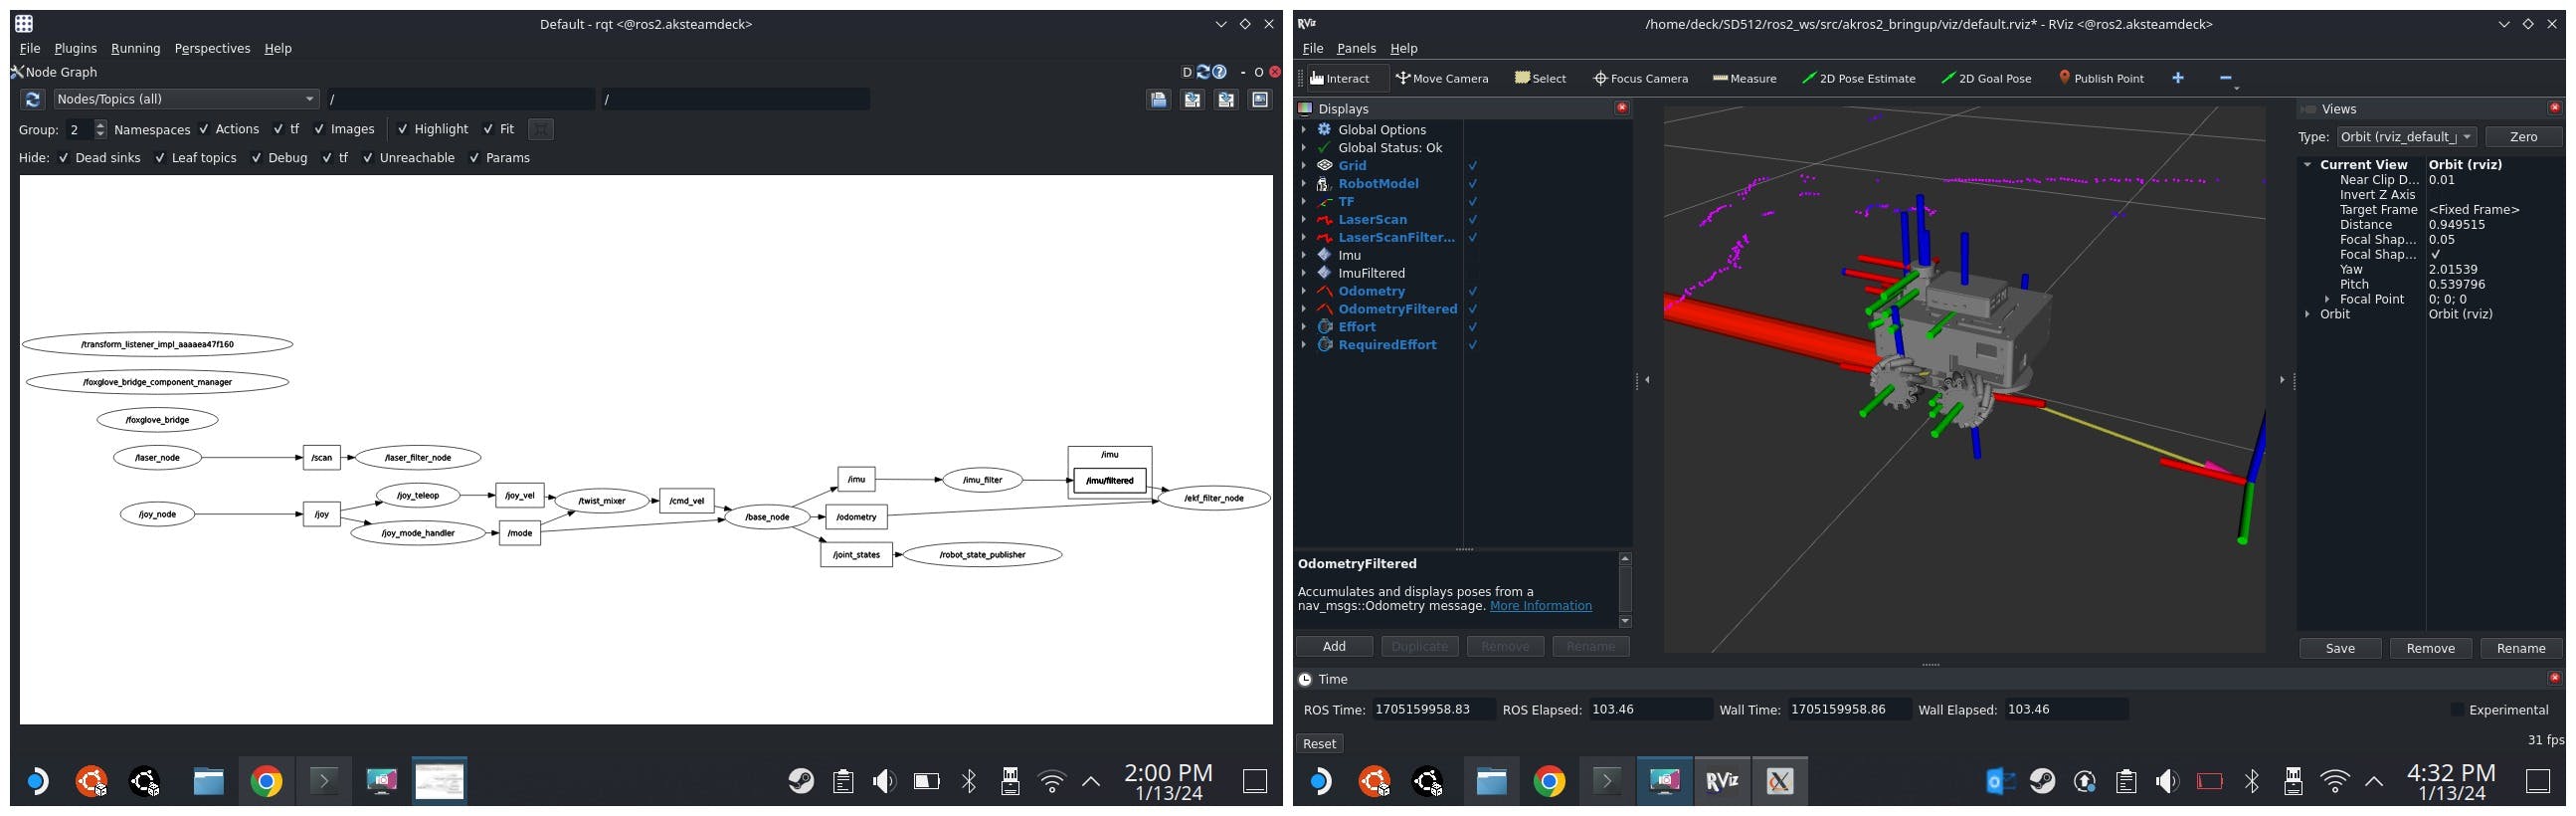
For me, because of my familiarity with Ubuntu and Debian-based operating systems, I decided to stick with Distrobox and uninstalled everything that was installed during the RoboStack setup. Once this was done, I then set up the robotics tools that I normally use. Note that (nearly) all these tools were installed inside the Ubuntu container, so they won't work directly from SteamOS, you need to start them from the container.
Installing ROS 2 Tools
Tailscale
First, Tailscale. I have been using it with all my robots for a few months now and it has been really useful in communicating between different ROS 2 systems over the network and makes it easy for any distributed (robotics or non-robotics) system. More about Tailscale and ROS on my blog post here.
While I had already installed Tailscale on SteamOS directly, for some reason I wasn't able to access it from the Ubuntu container, so I installed it again in Distrobox using the normal Ubuntu installation method. This worked as expected, and fortunately hasn't caused any issues with the other installation on SteamOS.
So, now my Steam Deck is on my Tailscale VPN and can list, echo, publish, and subscribe to topics and messages from other devices on the network. It works as expected using both Simple Discovery and the Discovery Server (Of course I had to update the XML config files for each discovery method first. Once again, more info on the blog post linked above).
Foxglove Studio
The ROS tool that I use the most these days is Foxglove Studio, mostly because it works so reliably, and on all my devices/browsers. From inside the Distrobox container, I followed the steps on the Foxglove Studio download page. I then logged in and imported my layout. I can now start relevant launch files on the robot and visualize the topics on my steam deck.

PlotJuggler and Groot2
Another tool that I use is PlotJuggler, a plotting tool created by Davide Faconti. I must admit, I haven't used it as often since I started using Foxglove Studio. Still, it is a very useful tool to have, so I also installed this from inside the container. Installing was again quite easy: run sudo apt install ros-$ROS_DISTRO-plotjuggler-ros and you are good to go (as long as you are running it from within the container).
While at it, I was also reminded that I will be working with BehaviorTree.cpp (another creation of Davide) later this year, so I also decided to get the accompanying editor Groot2. It includes a Behavior Tree editor, and real-time monitoring tool. I've only (unsuccessfully) used the first version of Groot, but I'm looking forward to trying out Groot2. I'm currently using the free version that only allows real-time monitoring of up to 20 nodes, which is more than enough for my hobby robot applications.

Driving AKROS2
Now, that I can use the Steam Deck to visualize my robot's state remotely, the next step is to use the joysticks and buttons on the device to send commands to the robot.
Controller Mapping
The first thing to do is update the controller mapping. The Steam Deck has two mappings for the controller - one for the Gaming mode, and one for the Desktop mode. I'm not going to do any robotics stuff from the Gaming mode, so I left the mapping as-is. However, for the desktop mode, I updated the mappings:

It is important to note that each input that will be used by the Joy package needs to be mapped to a controller function. I mapped the left and right Shoulder (L1/R1) and Throttle (L2/R2) buttons, the A/B/X/Y buttons, and both the joysticks (+ their buttons) to the controller inputs. Every other input is mapped to other actions that will be useful while in the Desktop mode. With the above mapping loaded, the Joy package could be installed and run without any extra configuration.
Note: The inputs that are mapped to non-controller actions (like the DPad for example), will show up as zeros in the published Joy message.
Updates to AKROS2 Drive
With the controller mapped on the Steam Settings and working well with the Joy package, the next step was to update akros2_teleop. I realized that the Steam Deck controller has the same mapping as my PS3/SixAxis controller. Since I don't use that controller anymore, I simply renamed the config files. I did not have to do anything else, the node worked as expected without any extra change.
Setting up Shortcuts
Now, I can visualize the robot's state, and also drive it using the Deck. However, it did get quite annoying after a while to manually launch a new terminal, enter Distrobox, then launch what I need to launch, and repeat this every time I want to launch something. Even to exit Distrobox, I needed to start a separate terminal and execute the exit command from there.
I eventually found a solution using .desktop files. It is a config file that is used set up application shortcuts and launchers. I started with ros2.desktop and stop_ros2.desktop, shortcuts to open a terminal and enter or exit Distrobox. Turns out Distrobox makes the first one for you for every container. So, I only had to change a few things, and use it as a reference.
ros2.desktop
[Desktop Entry]
Categories=Distrobox;System;Utility
Comment=Terminal entering ROS 2
Exec=/home/deck/.local/bin/distrobox enter ros2
GenericName=Terminal entering ROS 2
Icon=/home/deck/Setup/steamdeck_desktop/icons/ubuntu.png
Keywords=distrobox;
Name[en_US]=ROS2
Name=ROS2
NoDisplay=false
Terminal=true
TryExec=/home/deck/.local/bin/distrobox
Type=Application
stop_ros2.desktop
[Desktop Entry]
Name=StopROS2
Exec=/home/deck/.local/bin/distrobox stop ros2 --yes
Type=Application
Icon=/home/deck/Setup/steamdeck_desktop/icons/ubuntu_bw.png
Comment=Exits Distrobox and stops ROS 2 container
Categories=ROS2;
Terminal=false
NoDisplay=false
StartupNotify=true
Now I know that I have used full paths, and there has to be a way to avoid this, but I couldn't find one by the time I'm writing this post. Please do let me know if you know of a way I could use environment variables instead.
These files shown above are quite simple as they execute a single command each. However, for stuff like launching ROS packages or tools, I to put all the commands in a bash script and run this script from Exec. However, this did not work as it only launched a terminal and entered Distrobox. Any other command after this was ignored. Instead, I used two scripts. The first script is to set up and enter Distrobox, and execute the second script. Here's an example, my PlotJuggler shortcut:
plotjuggler.desktop
[Desktop Entry]
Name=PlotJuggler
Exec=/home/deck/Setup/steamdeck_desktop/shell_scripts/plotjuggler_app.sh
Type=Application
Icon=/home/deck/Setup/steamdeck_desktop/icons/plotjuggler.png
Comment=Launches PlotJuggler for AKROS2 on Steam Deck (from Distrobox)
Categories=ROS2;PlotJuggler;
Terminal=false
NoDisplay=false
StartupNotify=true
plotjuggler_app.sh
#!/bin/bash
export PATH=$HOME/.local/bin:$PATH
export PATH=$HOME/.local/podman/bin:$PATH
xhost +si:localuser:$USER

distrobox enter ros2 -- /home/deck/Setup/steamdeck_desktop/shell_scripts/plotjuggler.sh
Finally, plotjuggler.sh is what sources the ROS setup files and launches PlotJuggler. Similarly, I also added shortcuts for other apps that I normally use. I then made these .desktop files executable and copied them to ~/.local/share/applications for local access. If you want global access across multiple users, they should be copied to ~/usr/share/applications. Finally, I can access the shortcuts from the start menu, and can also add them to the desktop.

Demo
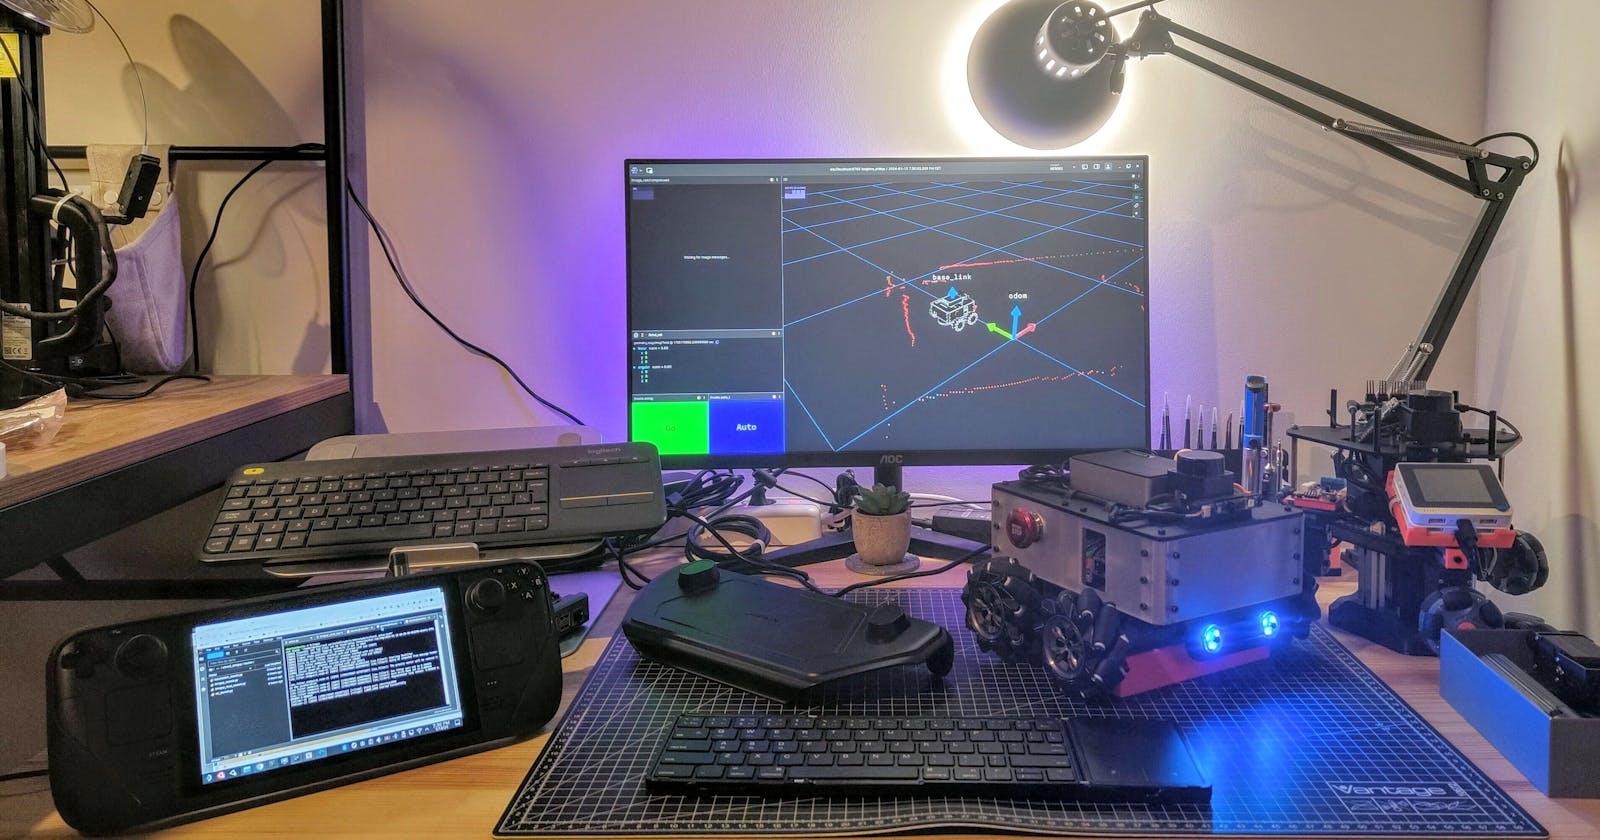
With everything now set up, I then went on to try it with the AKROS2 mecanum robot. First, I turned the robot on and launched all the relevant launch files. Next, I turned the Steam Deck on. It connected to the Tailscale network automatically. The next steps are visible in the video below: I launch the BaseStation shortcut from the Steam Deck desktop - this launches the teleop nodes and Foxglove Bridge. Then, I go back to the desktop and open the Foxglove Studio shortcut, which then opens with my default layout. Then, I can drive the robot using the joysticks, and button inputs for emergency stop, autonomous mode and throttle.
Steam Deck Accessories
Let's look at some of the accessories I added. They all have a utility, and have been really helpful so far. I had the following requirements:
For when I'm on the go, some kind of kickstand attachment. It is annoying to see the screen when the device is laid flat.
For my desk, I want a docking station. I already have a spare hub with multiple USB ports, SD card ports, an Ethernet port, an HDMI port, and power pass-through. So, this requirement can also be ticked off. But I want to design something around the hub that I can 3D print.

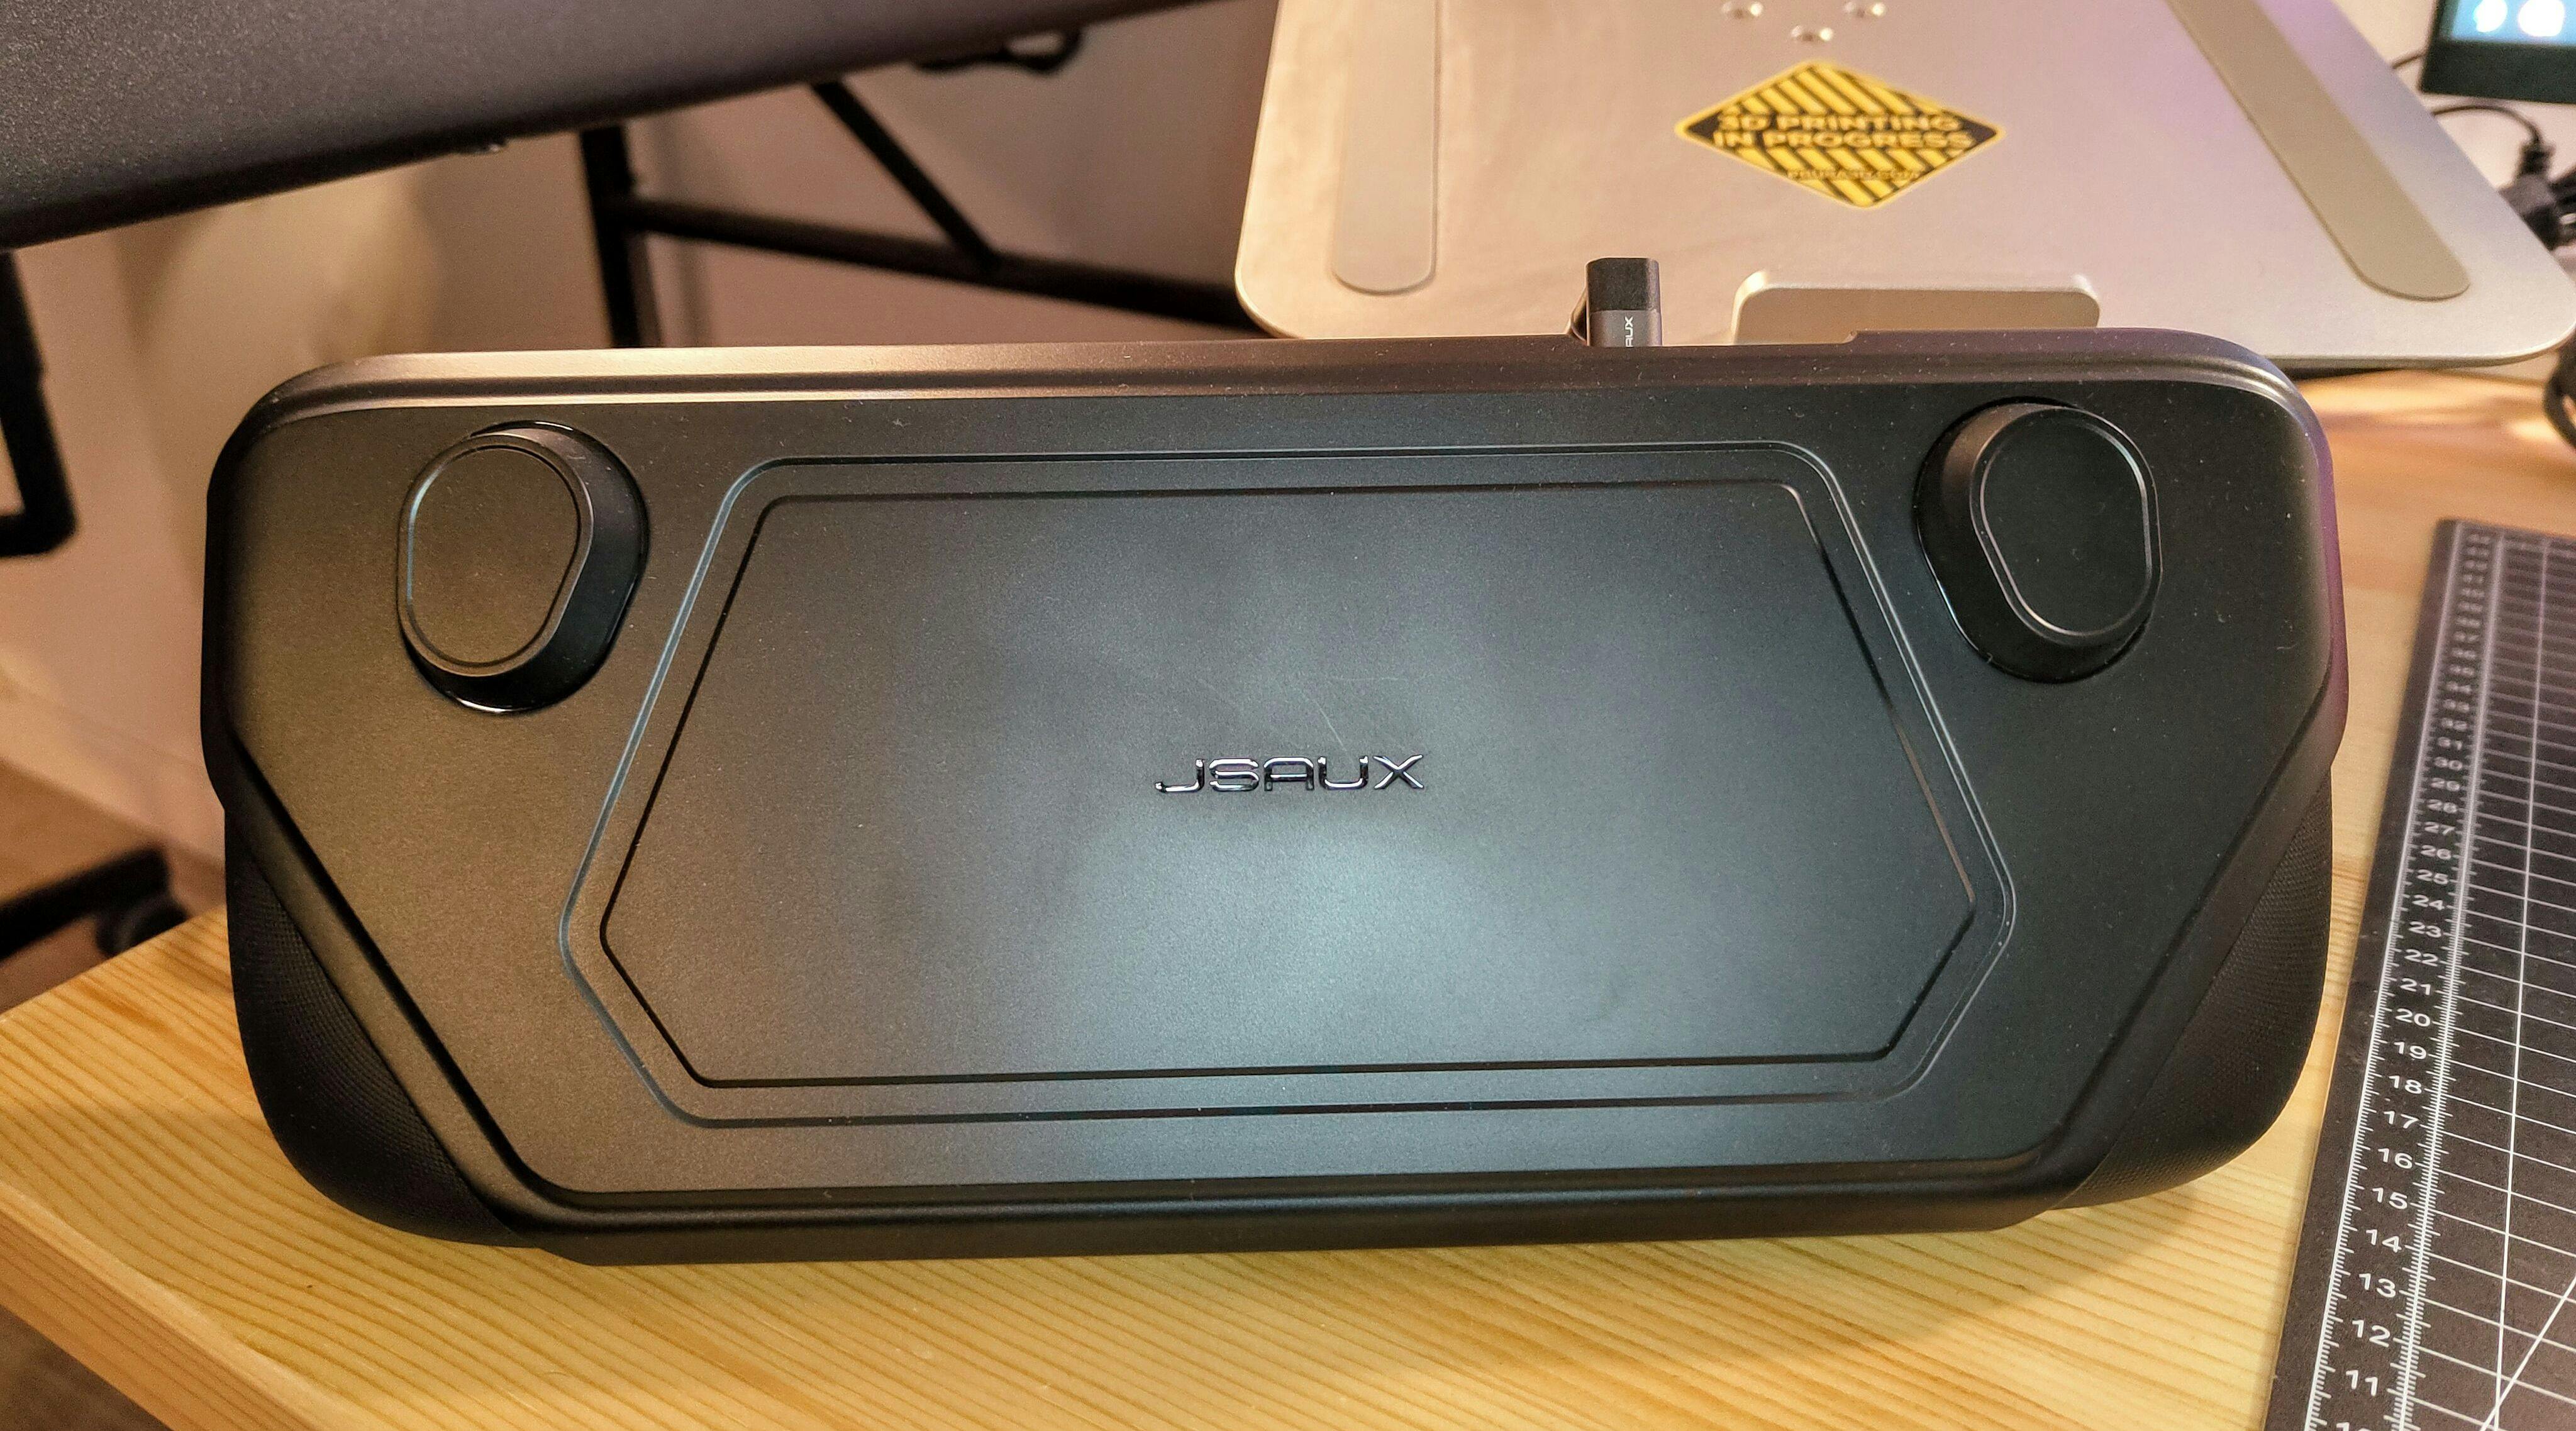
I was ready to do some 3D printing, but then I found exactly what I wanted on Amazon: The JSAUX Steam Deck ModCase. It is a modular case and top cover with a kickstand, with extra add-ons like a battery pack, a USB Hub, a cooling fan, and a strap for mounting other accessories. I went for the most basic kit:
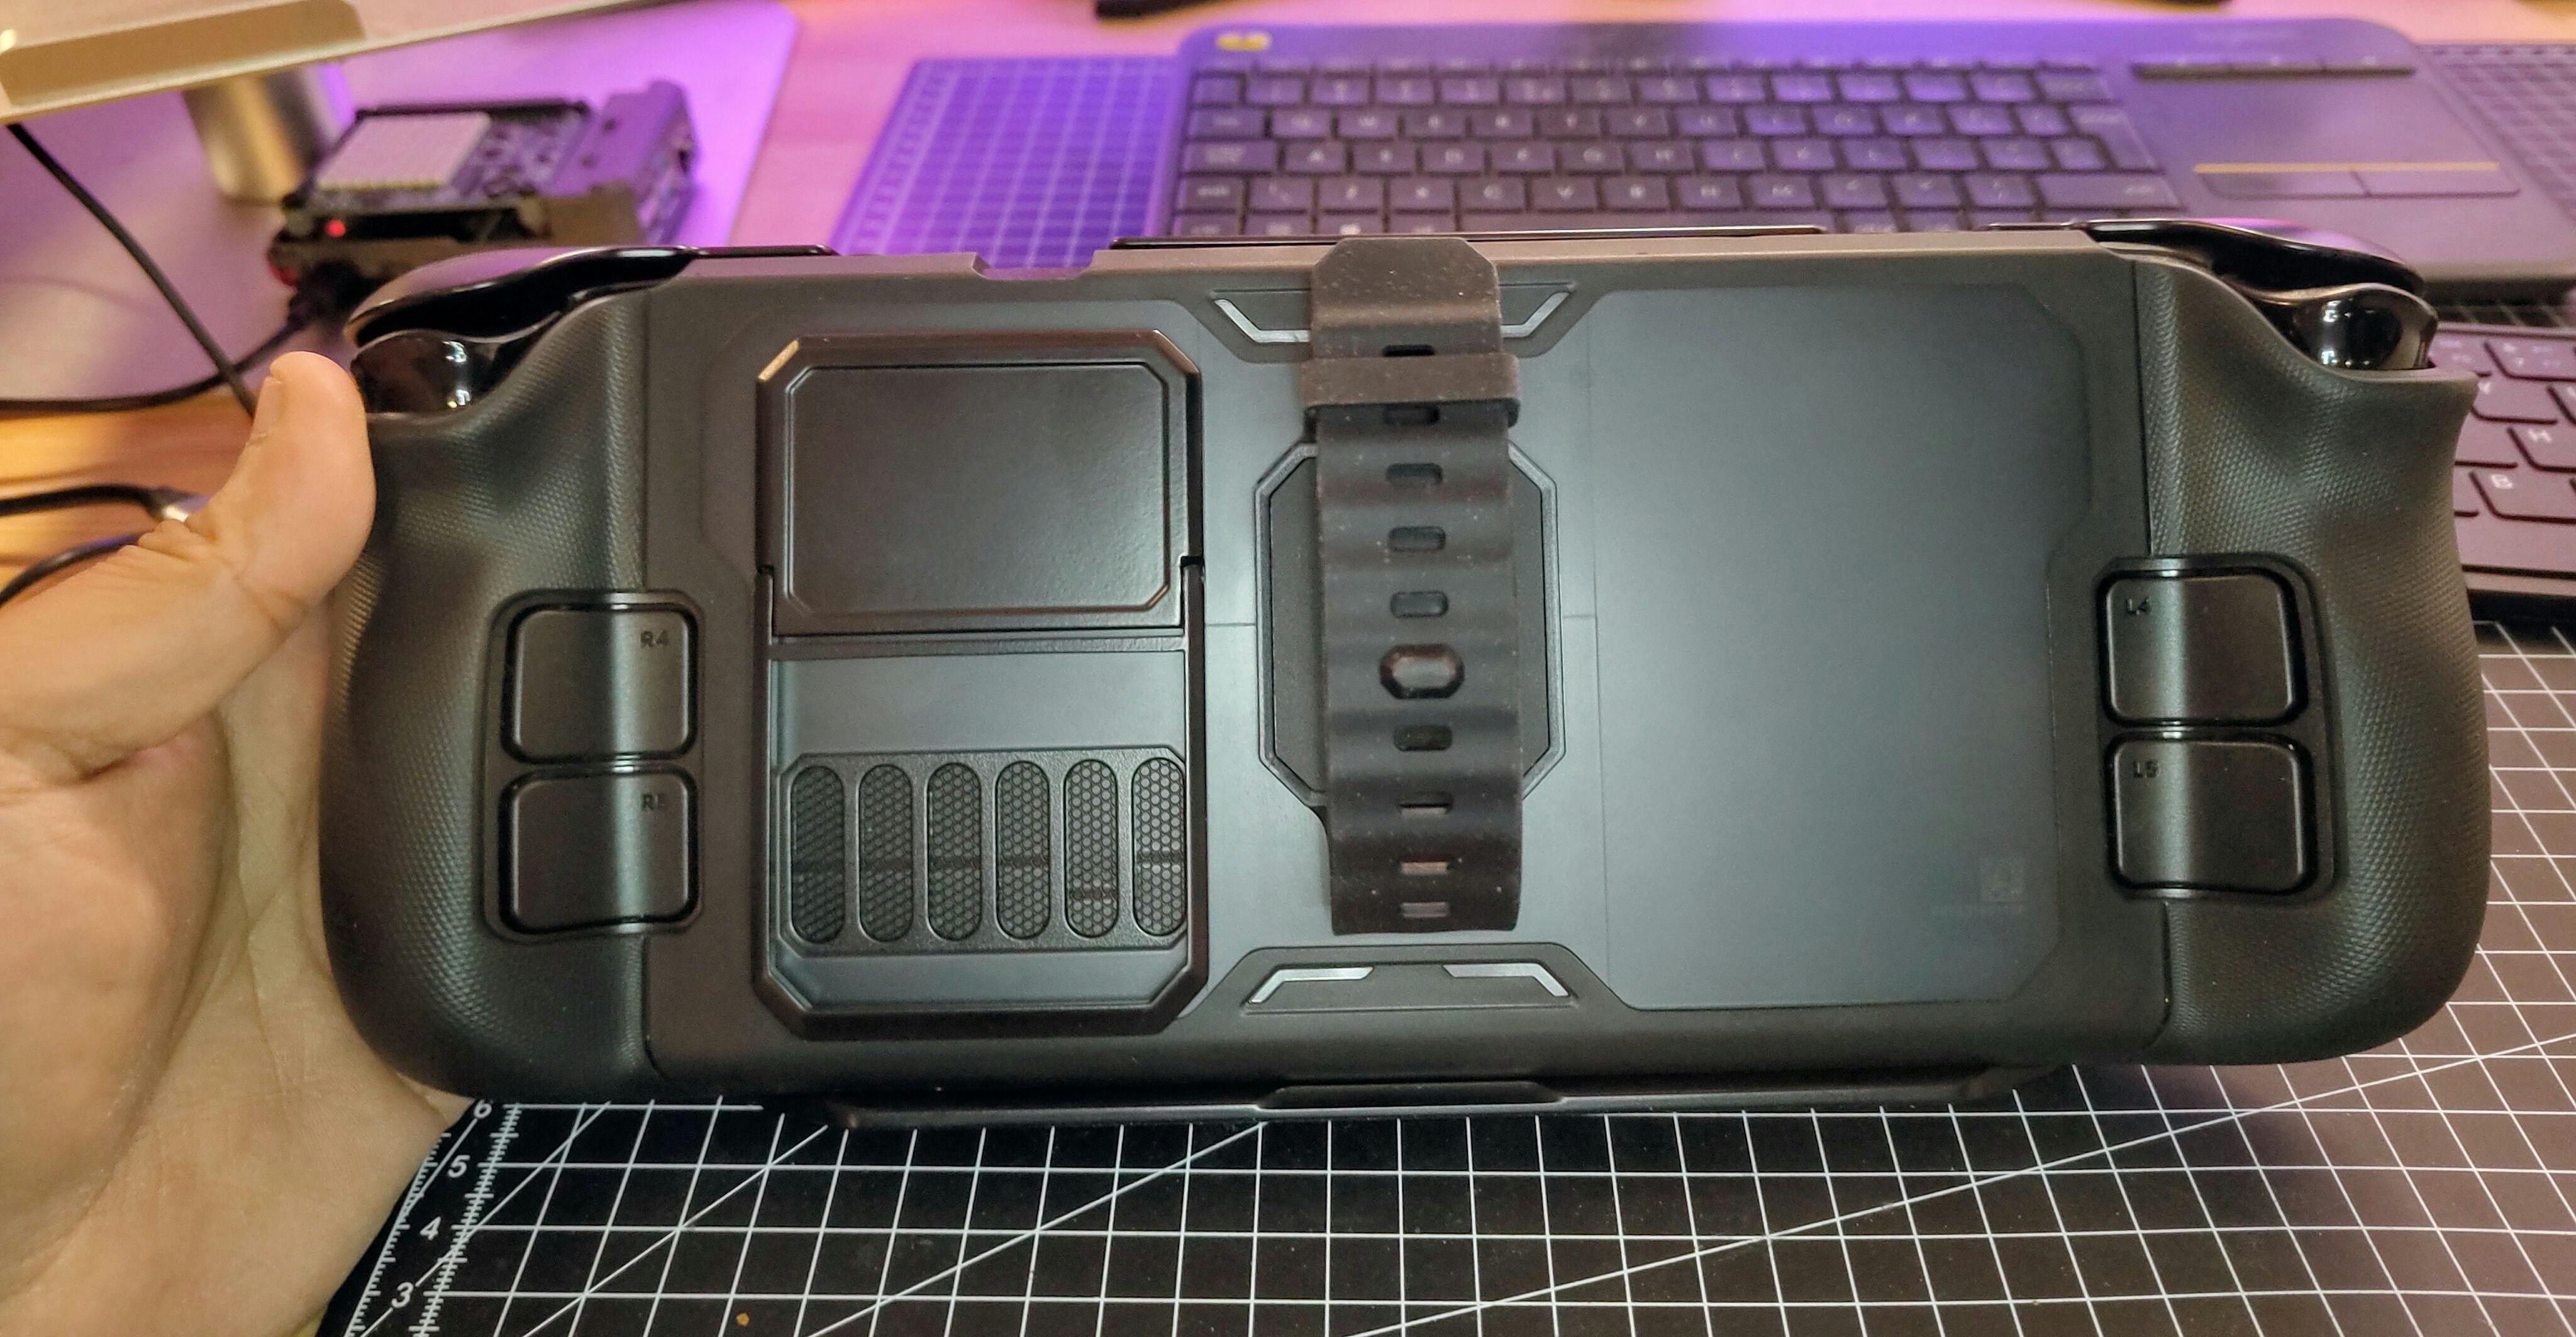
The case also comes with a hard-shell top cover. The cover fits tightly and covers all the inputs, except the back buttons. It leaves the volume controls, the power button and the USB-C port uncovered, which is convenient as I can dock it while the top cover is on, and use a monitor instead. Unfortunately, the case, with or without the top cover does not fit in the official carrying case, so it will just be for accessories at this point. I do want to get an alternative carrying case that can hold the ModCase, accessories, and the power adapter, but that is for another time.
For now, the JSAUX ModCase satisfies my first requirement, and the mounting strap satisfies a requirement I did not even think of. The top cover also replaces the bulky (and slightly ineffective) carrying case the Steam Deck came with. It is also modular, which means I can remove the kickstand or the strap attachment, or even better - I can 3D print my own! (JSAUX themselves have some free 3D models of ModCase attachments)
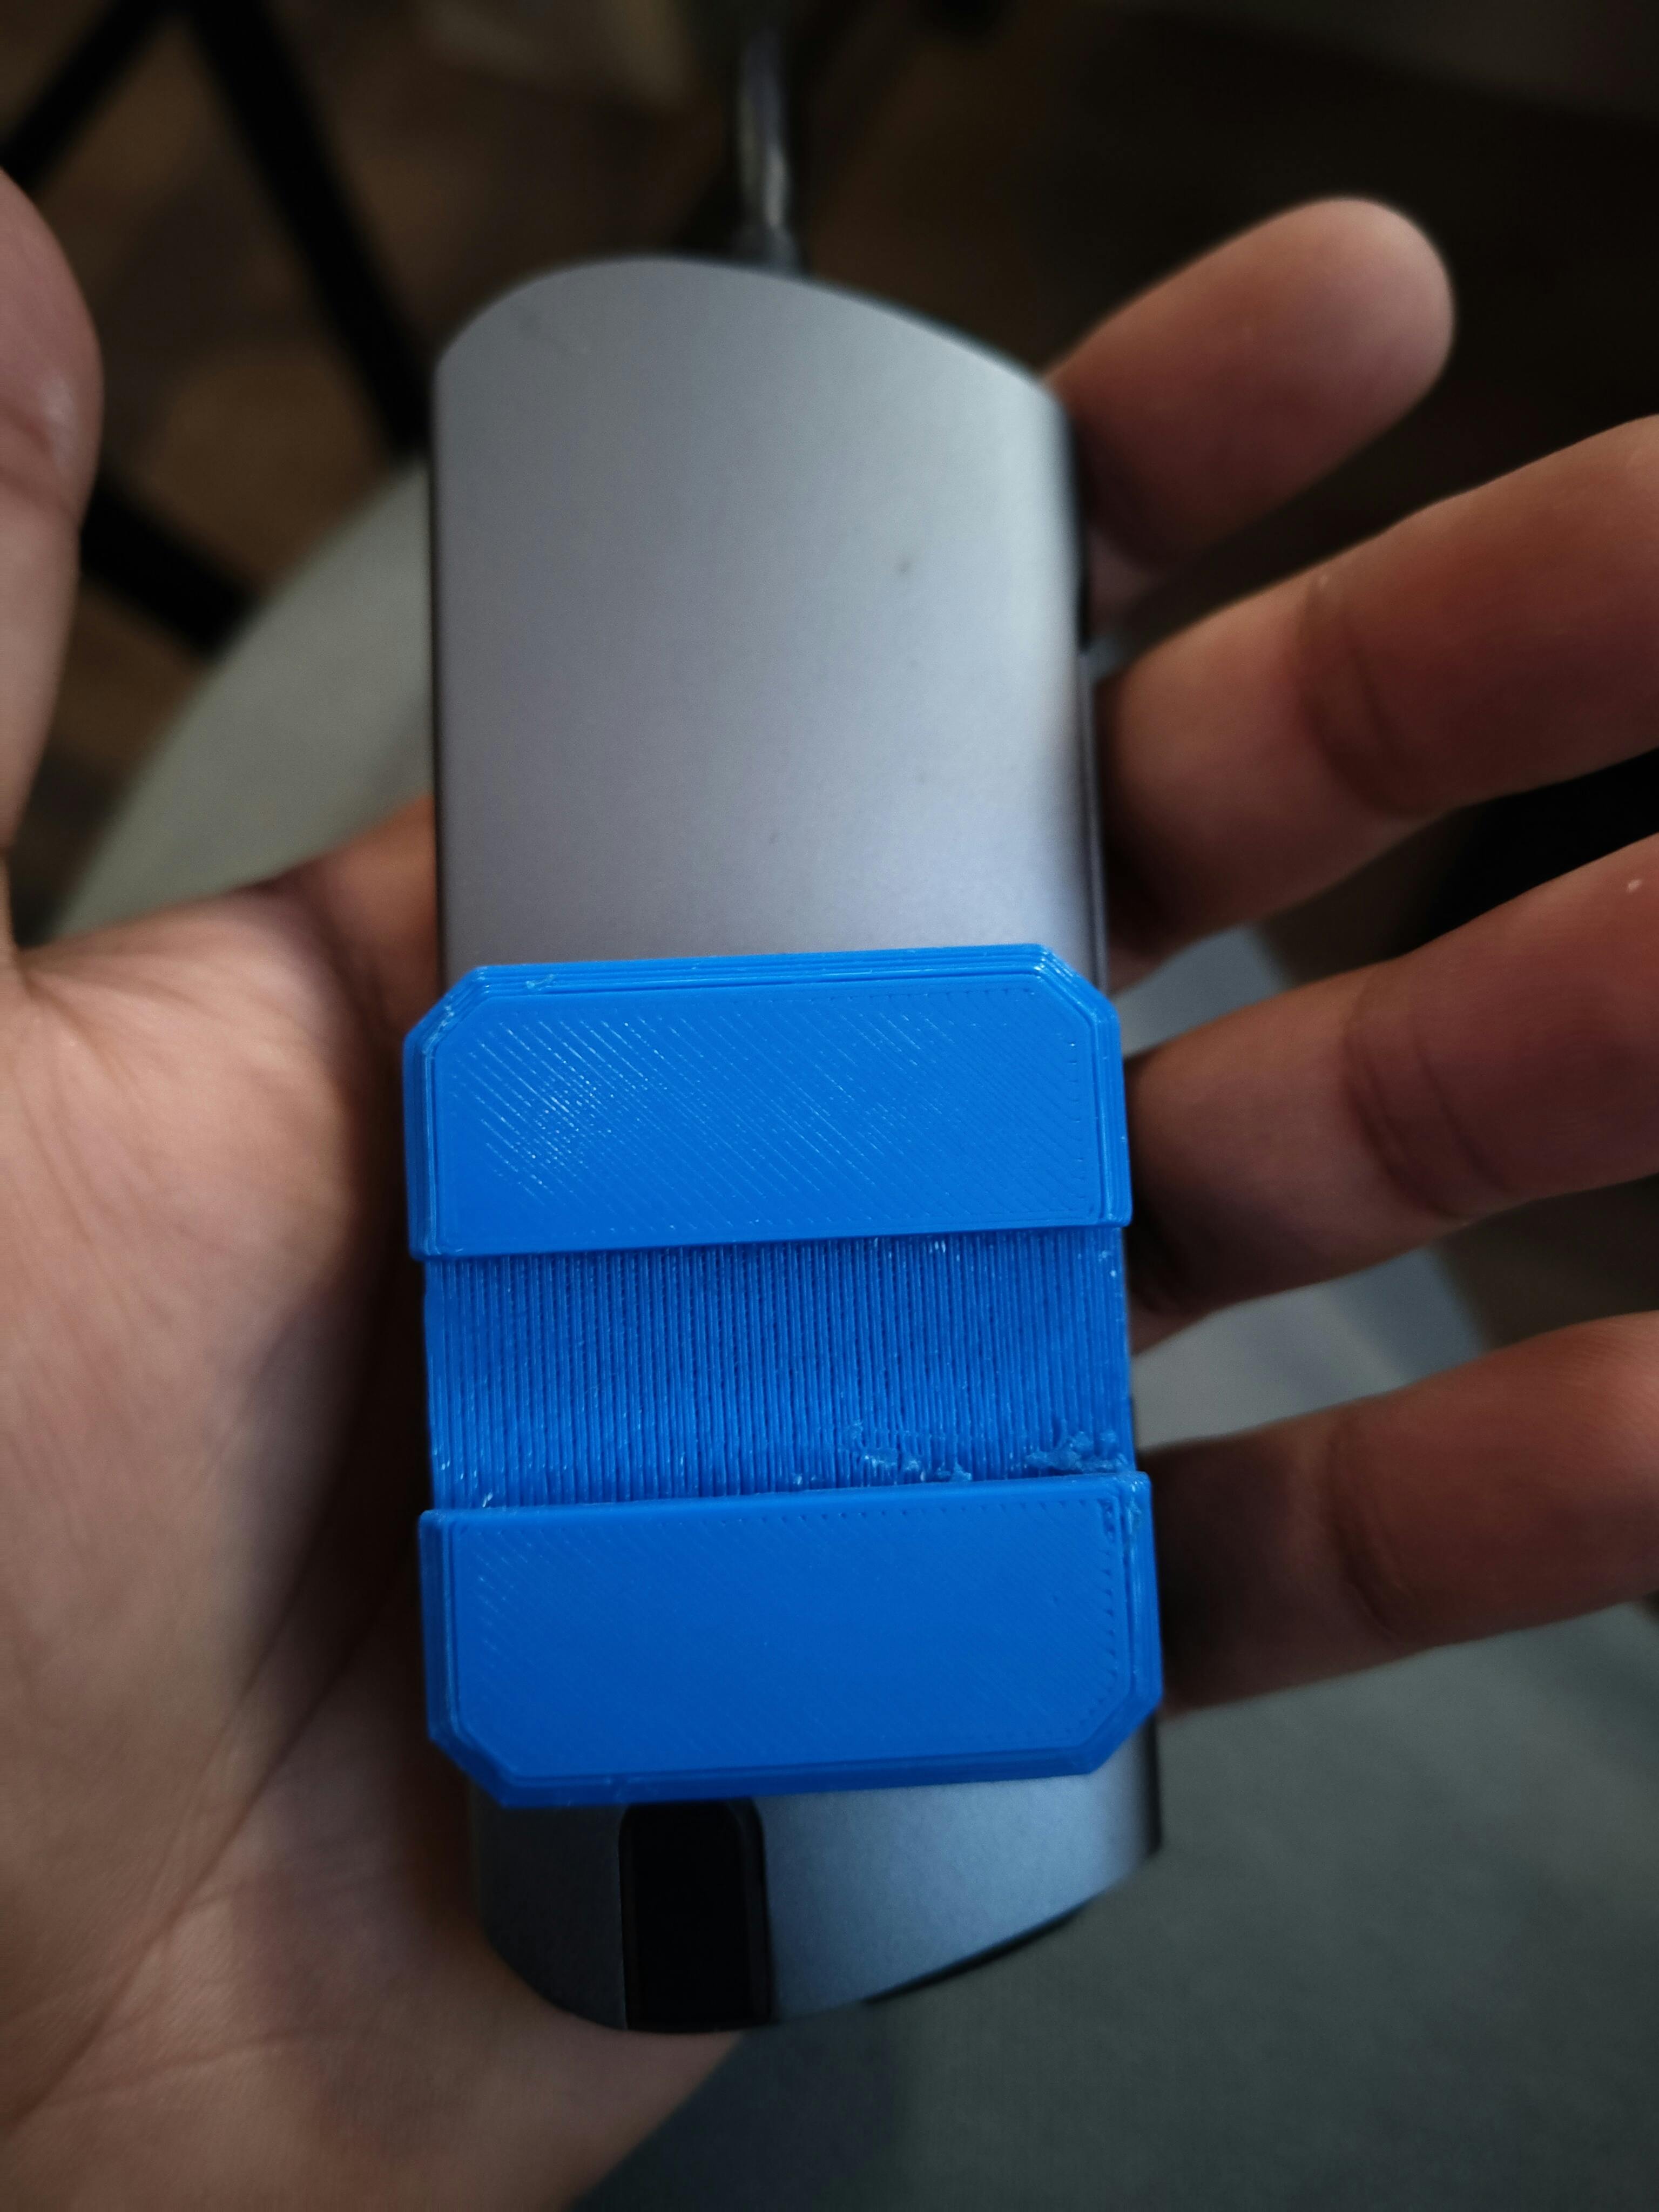
I first remixed JSAUX's official universal adapter file to make it more compact. I then stuck it using double-sided tape to the hub, which I could then simply slide onto the central mount of the ModCase when in use. Here's a comparison between JSAUX's official universal adapter and my remixed compact version:

I only realized after printing this that the surface of my hub is curved, but I managed to stick it with some double sided tape and some hot glue.
This didn't really work out, I need to plug the power cable from the bottom, and when I have my straight USB-C cable connected, I cannot use the kickstand properly because of it. I'm looking for a low-profile, angled connector. For now, I don't need to have the hub connected, can just let the hub hang behind the Steam Deck when docked.
I also designed and printed a ModCase adapter that lets me mount the strap attachment at 90 degrees to the central mount. This is quite useful as I can now strap accessories like a battery pack vertically without getting in the way of the kickstand.

The case + the accessories I already had + the cable I am planning to get together cost less than the official Steam Deck dock by itself, and it has been totally worth it. I have been using the kickstand all the time, and when working from my desk, I also attach the top cover and dock it in. The dock (i.e. USB hub) is always connected to a USB keyboard, a monitor, and a power supply, so all I need to do is plug the dock cable into the Steam Deck.

Next Up
I'm still working on getting webrtc_ros working with my camera - I think I'm having an issue with the image format that v4l2_camera is publishing. I also need to tune the sensor fusion parameters on the robot.
I'll also be working with ros2_control, as I am nearly done assembling the 3-wheeled omni robot, which can be seen in the picture above. I'm also almost done working on the URDF for the robot, then it is time to work on the controls. I'm glad to be working with C++ again, I will be able to brush up some rusty skills. I've been spending too much time working with Python (and some C at work).
Other than that, this year I'll also have an opportunity to work on some multi-robot projects. Another reason to finish up the omni robot. But more about this later.