


In my last post, I talked about migrating from ROS 2 Galactic to Humble. I faced a few problems, some of which I solved, but there were still a few open issues:
PS4 controller and ds4_driver: I started having some issues with the ds4_driver node and the corresponding twist node a few minutes after I launched them. The twist publisher stopped publishing completely, even though the ds4_driver still published the status of the PS4 controller inputs. I also was unable to set the feedback (LED colors, rumble) on the controller.
Parameter Server on micro-ROS: On micro-ROS Humble, the parameter server is initialized differently compared to Foxy/Galactic. My first try did not work, and I had to comment the parameter server part out of my code. I need to revisit this bit later.
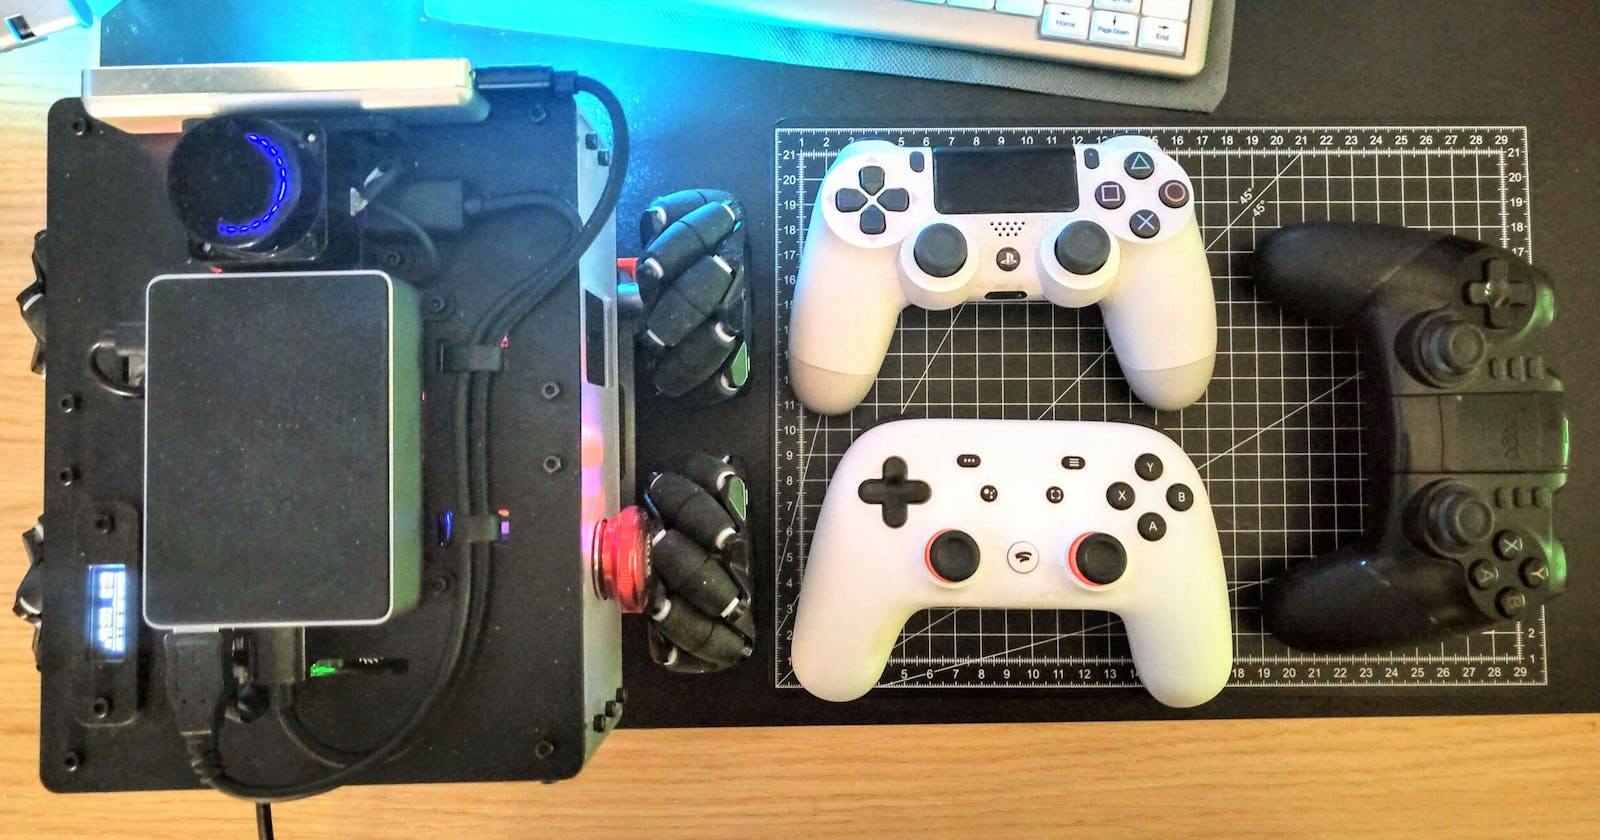
In this post, I'll only talk about the first part: the ds4_driver issue. I first tried a few small changes, but nothing seemed to fix or improve upon the issue. So, for a weekend project, I decided to try using the joystick_drivers package along with teleop_twist_joy to replicate the functionality of the ds4_driver package. The joystick_drivers package does not set feedback back to the PS4 controller, but as an advantage, it works with a variety of game controllers. So, I gathered the other controllers I have (a 3rd party Sixaxis/PS3 controller, and a Google Stadia controller that I had experimented with a few weeks ago) and decided to try all three of them.
Setup
To set everything up, I first cloned the ROS 2 branch of the joystick_drivers package to my workspace, as I thought I might have to modify some things to get the Stadia controller to work. I also installed teleop_twist_joy using the following command:
$ sudo apt-get install ros-humble-teleop-twist-joy
I have used this utility before and know it works out of the box, so I decided not to install it from source. As for the joystick_drivers package, I had to first install some dependencies to make it build on Humble, and then make some small changes to the launch file to get it working. You can check out my fork of this repository to see these changes.
From joystick_drivers, I chose to use the joy node - which is the generic node for all joysticks showing up as /dev/input/jsX on the Linux system. Similarly, there is another node called joy_linux which is for all joysticks showing up as /dev/input/eventX. Each of these nodes listen to the inputs on the joystick and publishes sensor_msgs/msg/Joy type messages. An example is shown below:
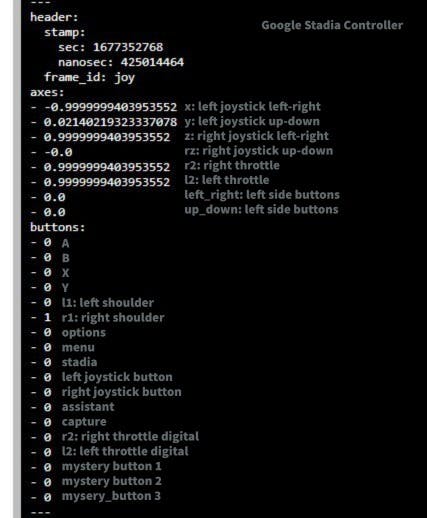
So, the entire game controller can be mapped to its corresponding axes and buttons by moving the controller inputs, and simultaneously monitoring the output of the joy node. These mappings can be used to assign controller inputs to each velocity component, and also assign buttons to the enable and throttle functionality of teleop_twist_joy. I'll explain more about this later.
Alongside the joy and teleop_twist_joy nodes, I also wrote a simple node to subscribe to the sensor_msgs/msg/Joy topic and publish the mode (the state the robot is in: teleop or auto) and an emergency stop signal once corresponding buttons are pressed. This mode and e-stop messages are read by the twist multiplexer and the micro-ROS node to drive/stop the robot.
PS4 Controller
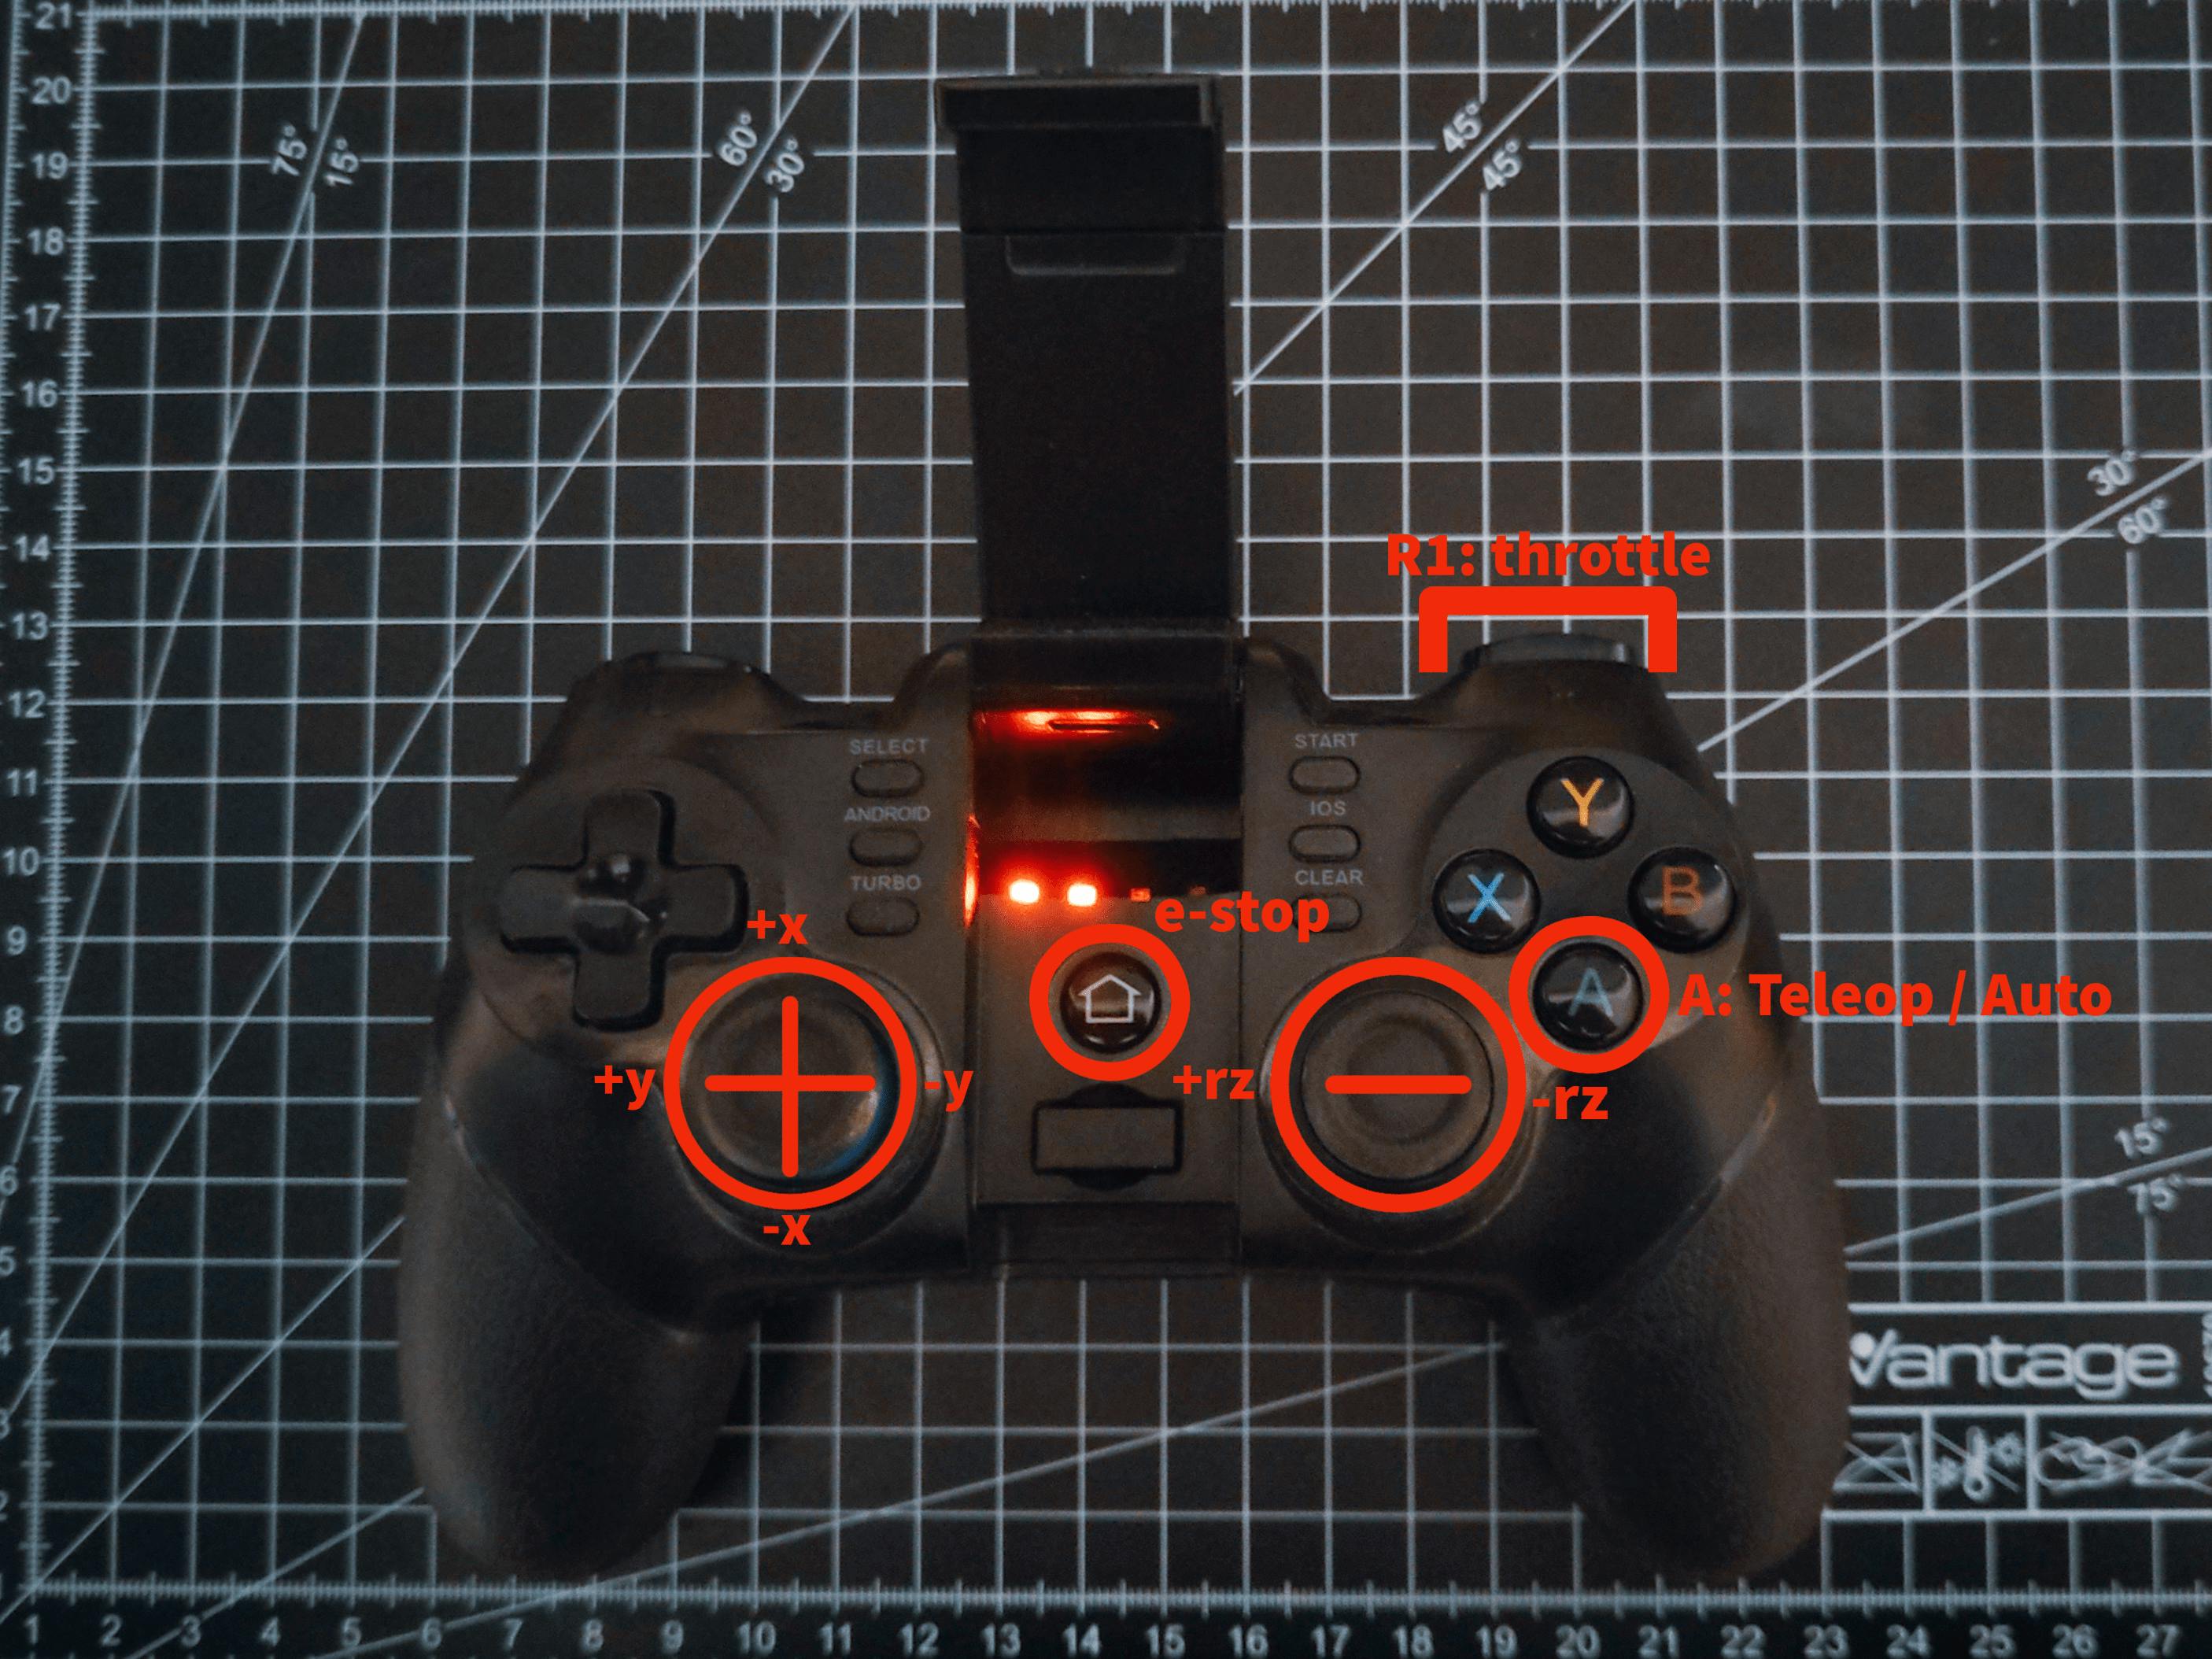
I first started with the PS4 controller, which I had already connected to the RPi over Bluetooth, using this amazing tutorial. It was already showing up as /dev/input/js0 and /dev/input/event0, so I could have chosen between the joy and joy_linux nodes. I chose the joy node and once I launched it, everything started working straight away. I used the output of this node to map each button/axes to the physical buttons and joysticks on the controller. Then I configured both the teleop_twist_joy node and the mode/e-stop publisher using config.yaml files according to the following image:
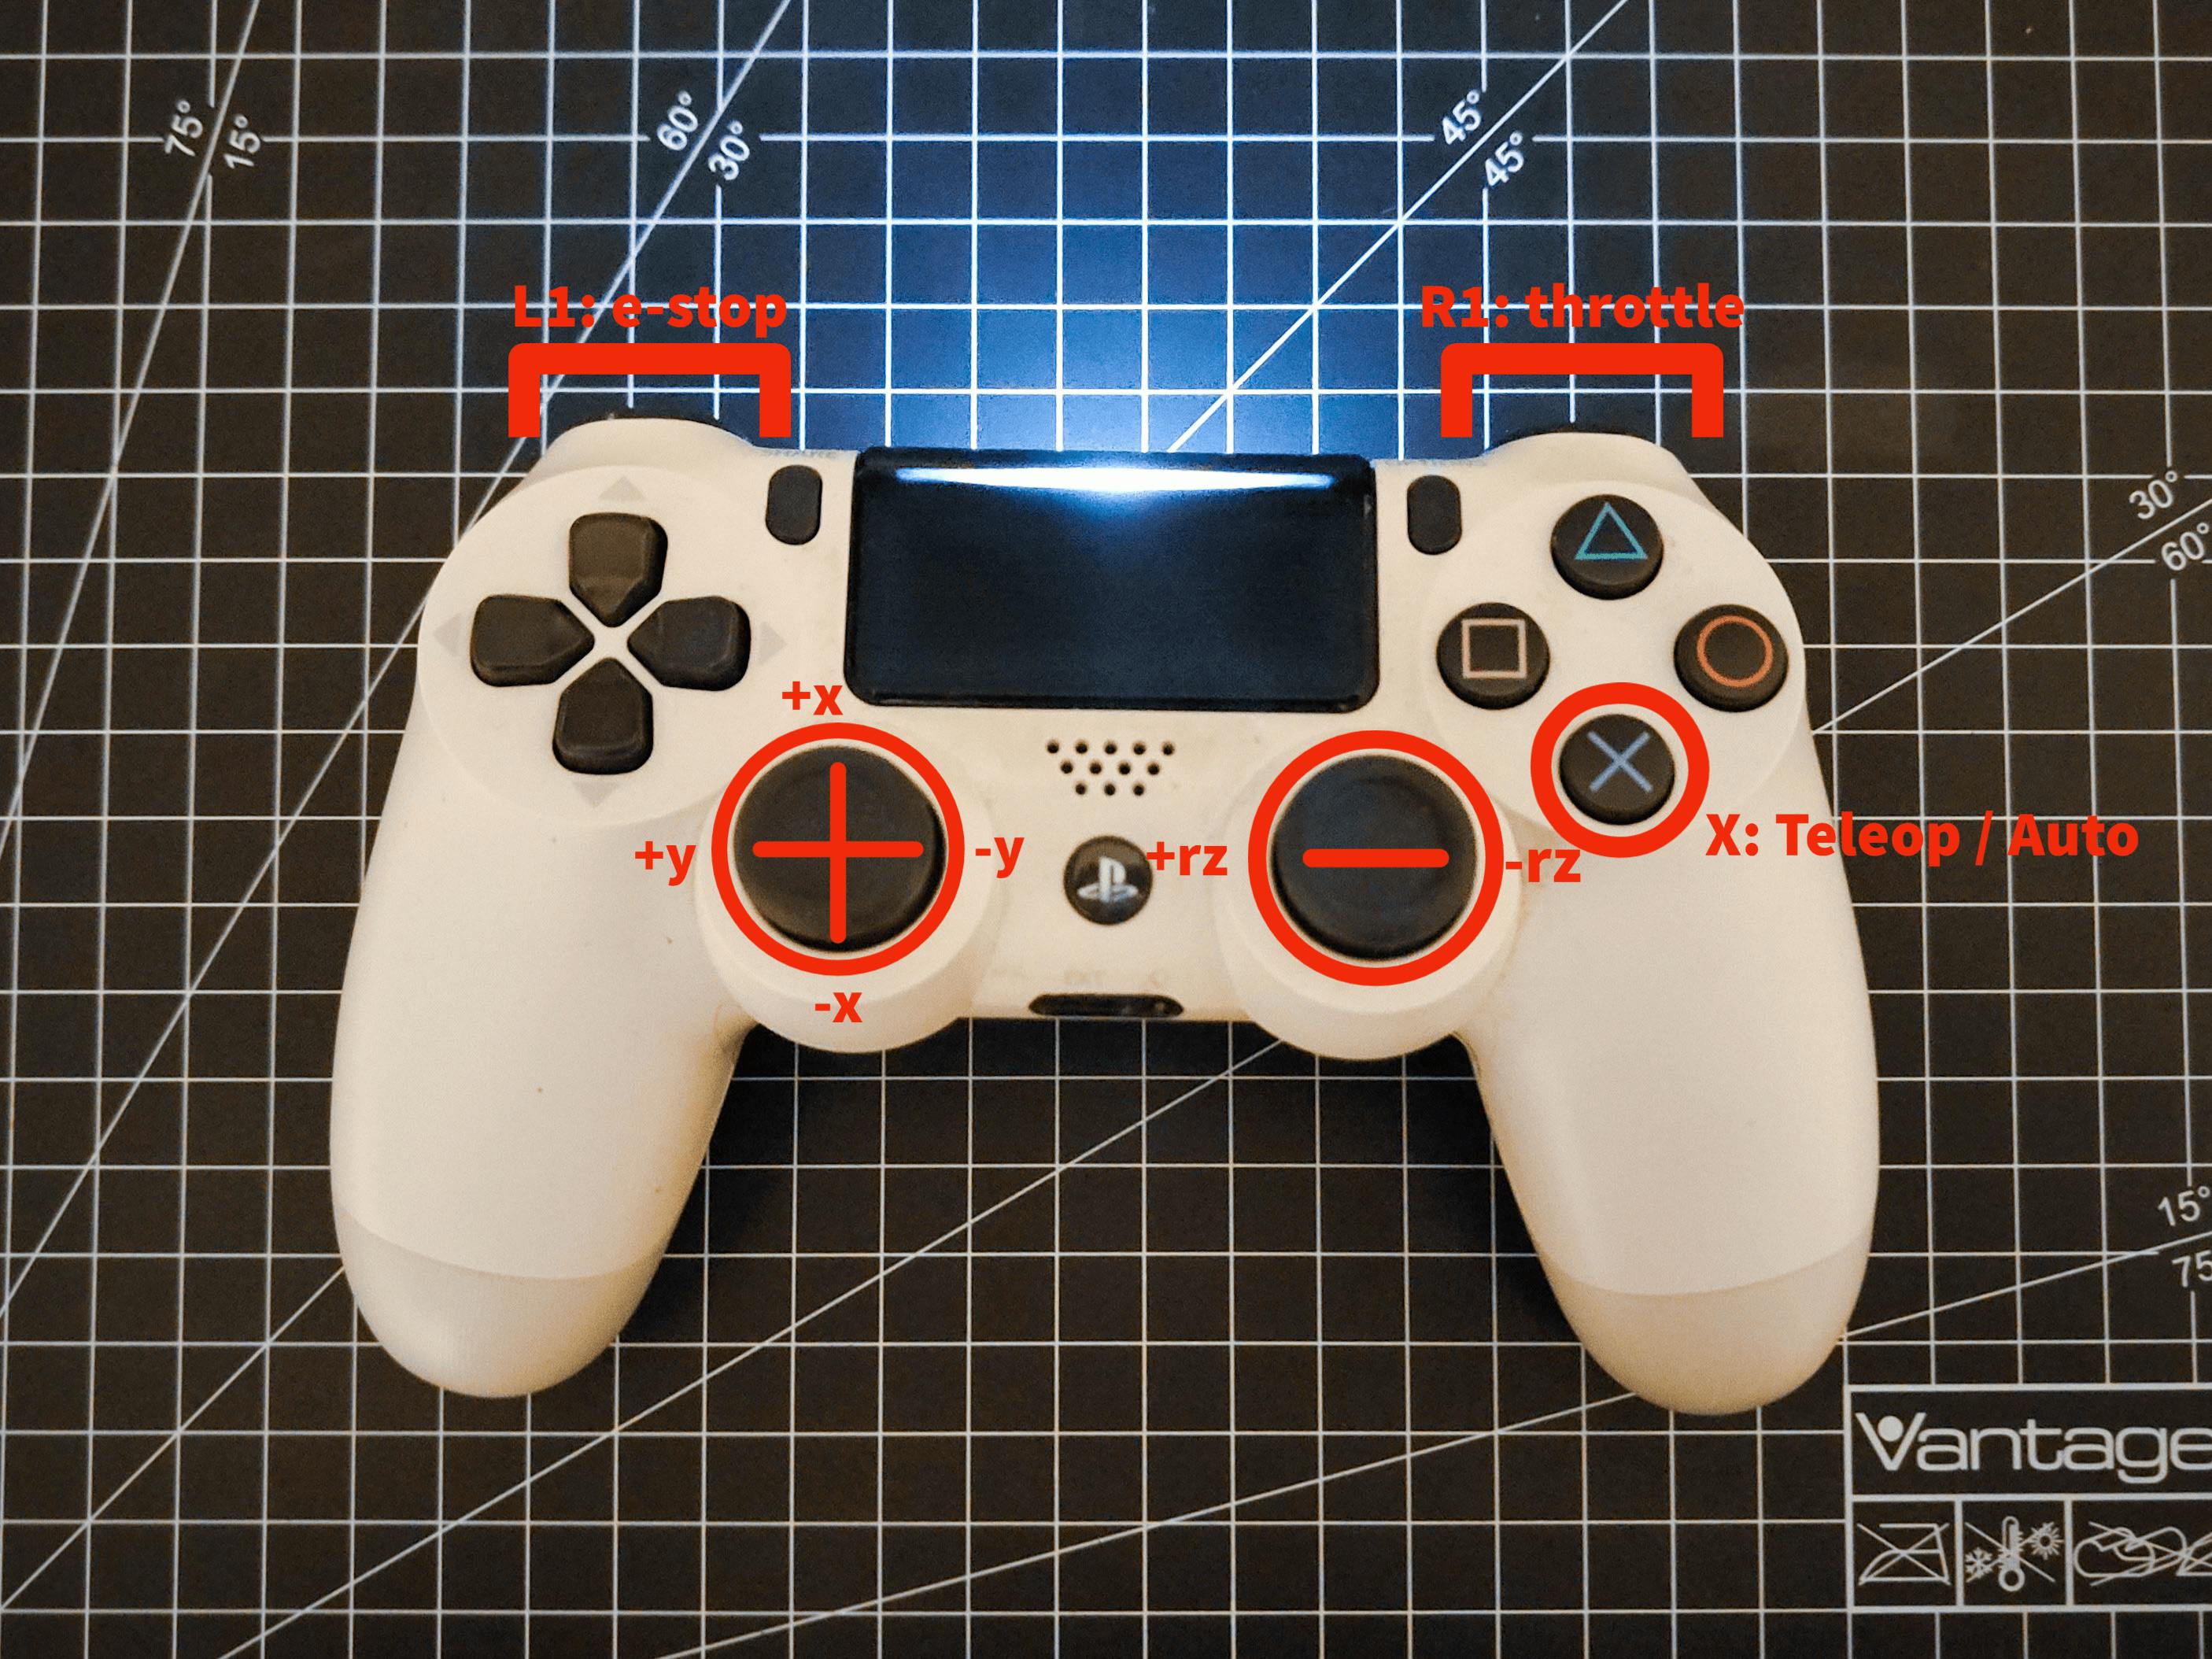
In the above image, the left joystick is used to provide linear velocities to the robot, in both X (front/back) and Y (left/right) directions. The horizontal axis of the right joystick is used to rotate the robot around the Z axis of the robot. This follows the right-hand rule as explained here. The X button is used for switching between teleop and autonomous modes, and the two shoulder buttons are used to stop the robot or throttle the velocities. Similar mapping is done for all the three controllers.
And voila, everything worked on the first try. I played around till the robot's battery ran out, but the system did not fail like with ds4_driver. I chose not to configure an enable button according to the teleop_twist_joy logic as it needs to be pressed continuously for the twist to be published and does not function like an on/off switch. So, I replaced it with the e-stop and only enabled the throttle button, which increases the published twist messages by 50%. It's a nice little speed boost.
The PS4 also has some additional features - like a trackpad with a button, the ability to set rumble as an analog value, and a controllable display LED. Unfortunately, the rumble and LED control don't work, and the trackpad input is logged as an invalid input (error) in the joy node. I need some more time to fix this, but for now, I have changed the severity of the logs to a warning, so it is not printed on the terminal anymore.
Sixaxis / PS3 Controller
Next, I picked up the 3rd party Sixaxis / PS3 controller. This is not my favorite controller, although it does come with a phone holder which is very handy. Connecting it via Bluetooth is not straightforward but it comes with a USB dongle, which unfortunately uses the only remaining port on my RPi. With the dongle, the controller only shows up as /dev/input/js0, which is fine with the joy node.
Just like the PS4 controller, I first mapped the input buttons and joysticks to the resulting Joy message. The configuration is slightly different, and the controller has some additional buttons. I also realized that the left shoulder button wasn't working, so I used the middle button (don't know what else to call it) for the e-stop.
I won't be using this controller going forward. Mainly because of the broken button, but also because it takes up the last USB port on my RPi. But at least I verified that it works with my setup, and it is a handy backup in case I don't want to use Bluetooth.
Stadia Controller
The Stadia controller is one of my favorites - it has some weight to it, which feels comfortable in your hands. The buttons and the joysticks have good feedback and are quite sturdy. However, the controller is quite smooth, with round edges and slips often when being used.
It also has a few more inputs than the PS4 controller - two more buttons on the front panel, and three inputs via the headphone jack. I assume they correspond to play/pause, volume up, and volume down, but I could be wrong. For now, I have named them "mystery buttons" 1, 2, and 3. The controller is also charged by USB-C unlike the other two that need micro-USB.
Just a few weeks ago (using the same tutorial I shared earlier), I connected the Stadia controller to the Raspberry Pi over Bluetooth for the first time. It showed up as both /dev/input/js0 and /dev/input/event0 so it would work with the joy node. At that time, I used python-evdev to read the inputs, and I uploaded some simple scripts to GitHub.

Once again, connecting the Stadia controller to the Joy node, and mapping the inputs was straightforward. I used the same mapping as the PS4 controller and shown in the above image.
Just like the PS4 controller, I was unable to set the vibration motors / rumble of the controller. I hope I can set it with an analog value just like the PS4 controller, but I am not entirely sure. There is also no display LED like the PS4 controller, only a status LED that cannot be controlled.
Final thoughts
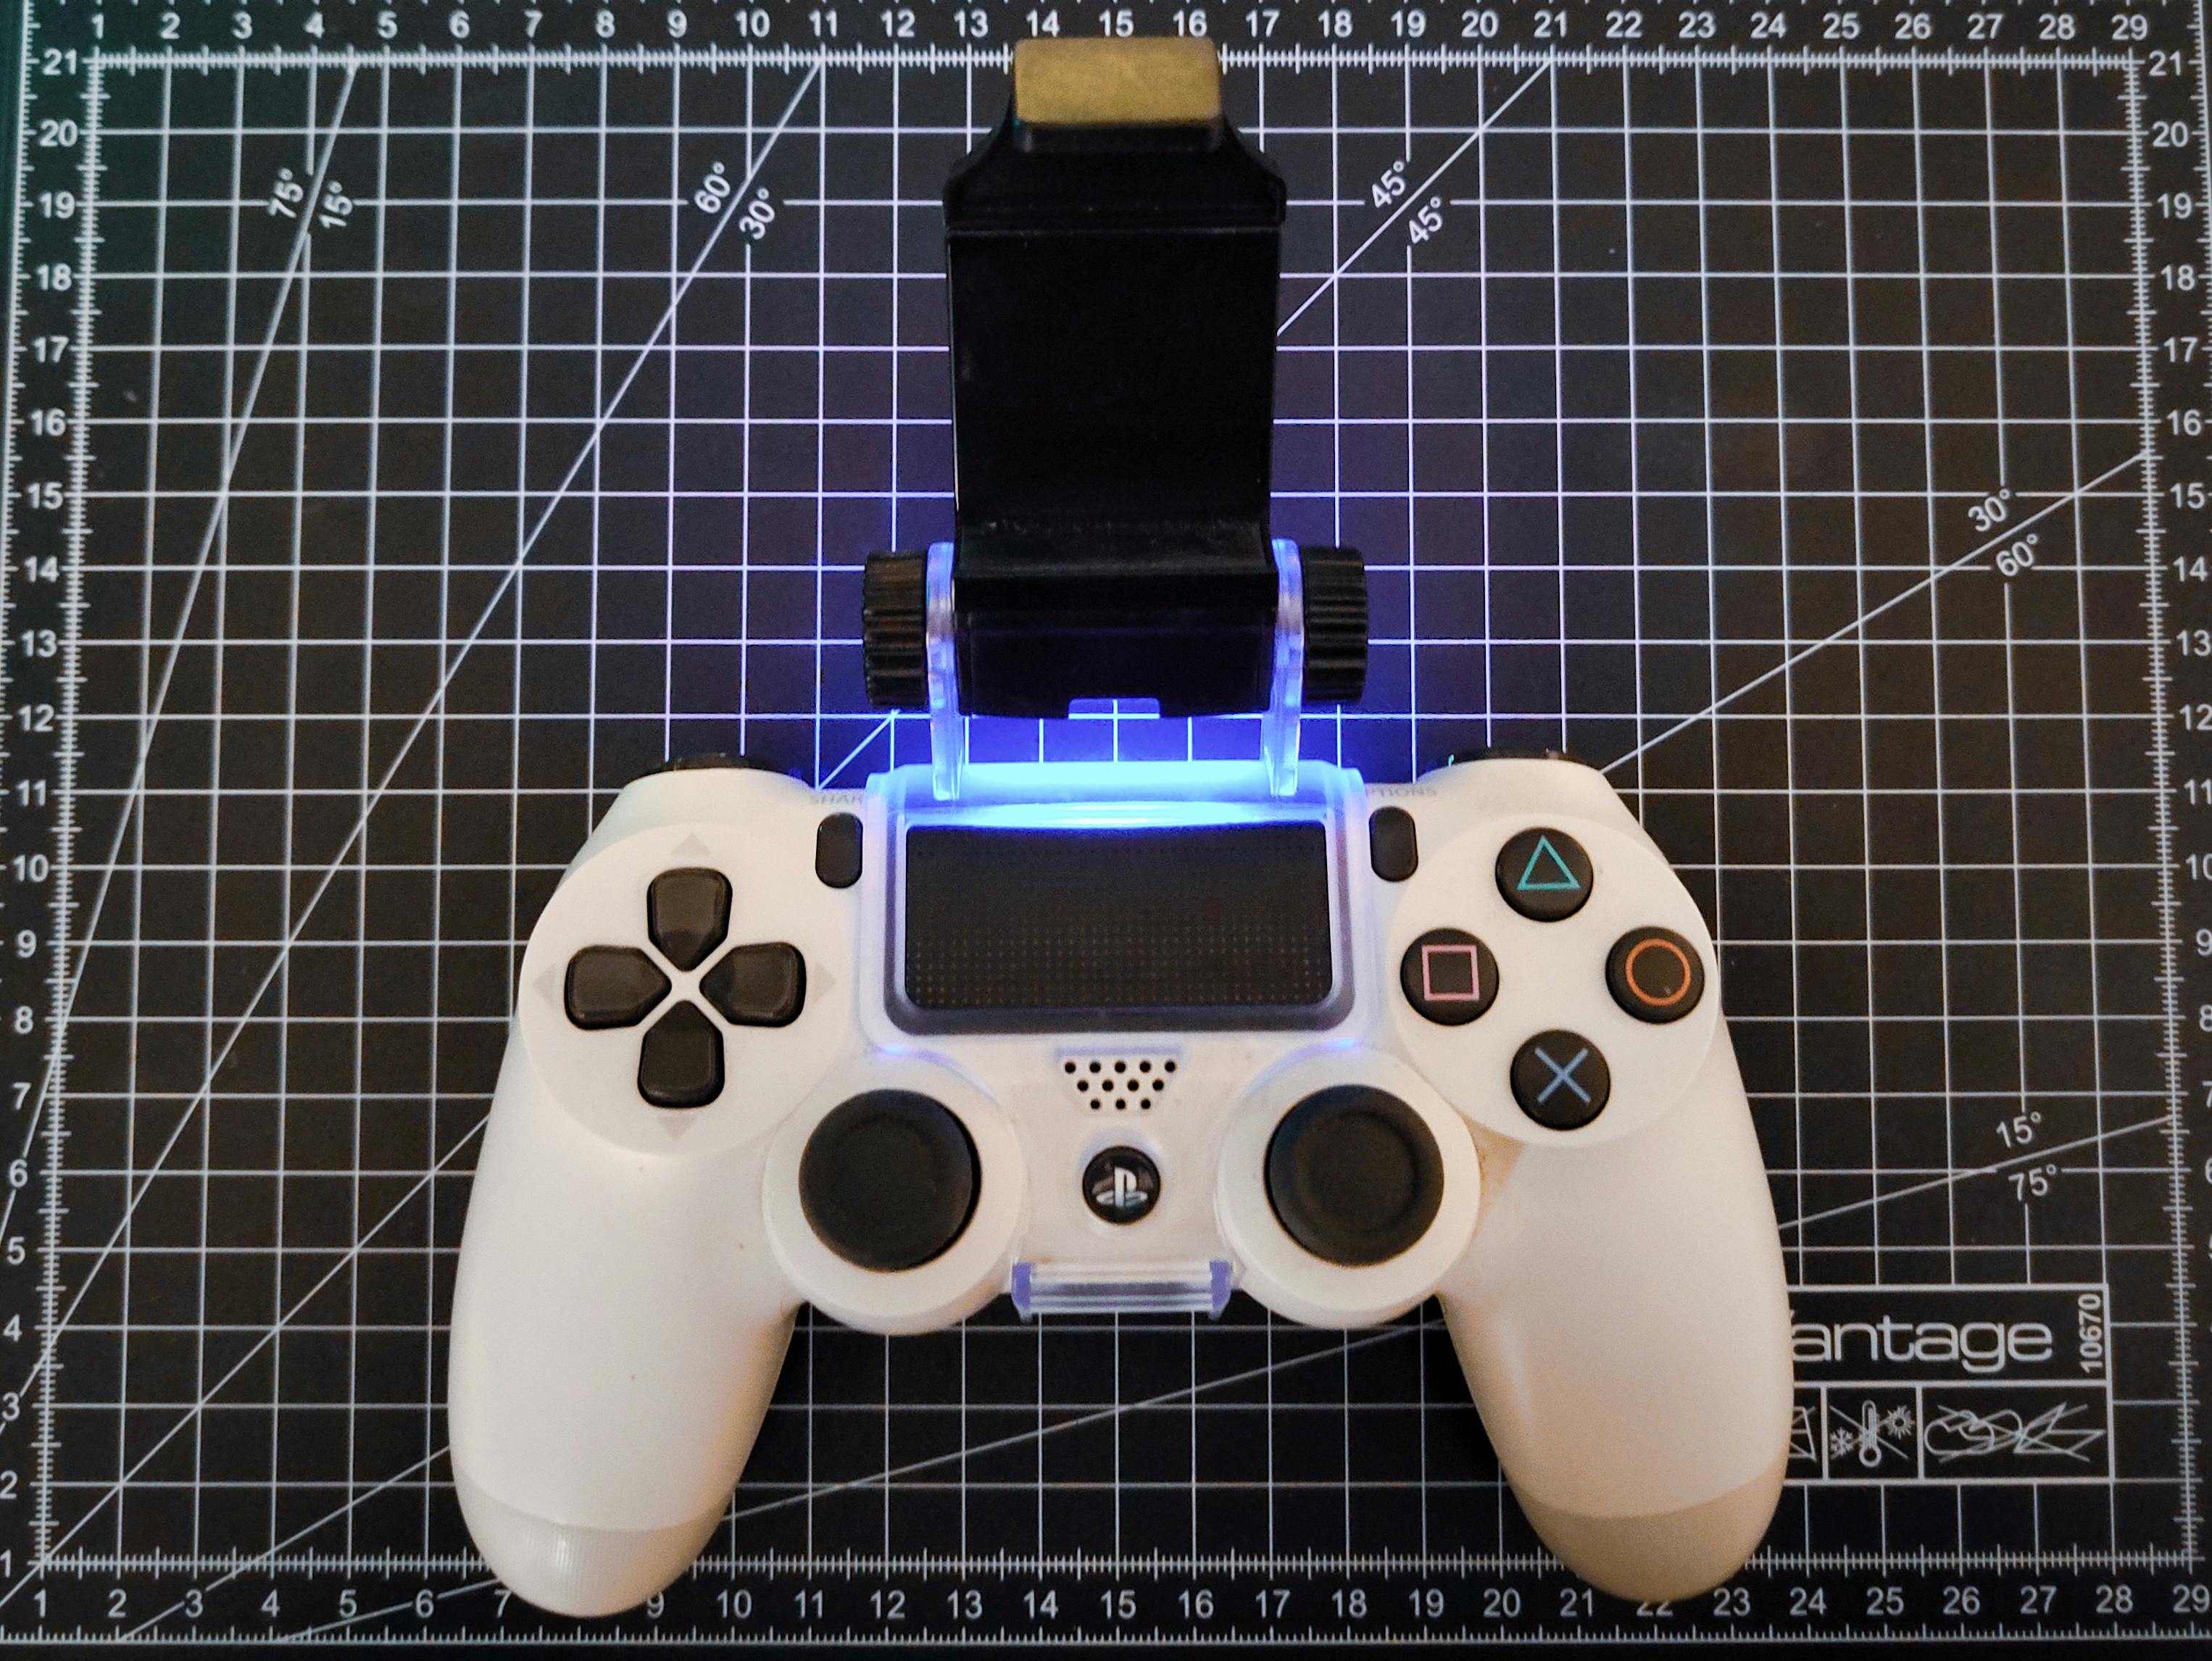
After trying all three, I had to choose one controller to use with my robot. They all worked quite well and were very similar to each other in performance. I finally chose the PS4 controller - mainly because there are a few things that I want to implement in the joystick_drivers package - a function to read the trackpad and its buttons, and a way to set feedback like rumble and LED control. I also have an accessory for the PS4 controller that lets me attach a phone to it, which makes it quite easy to capture videos.
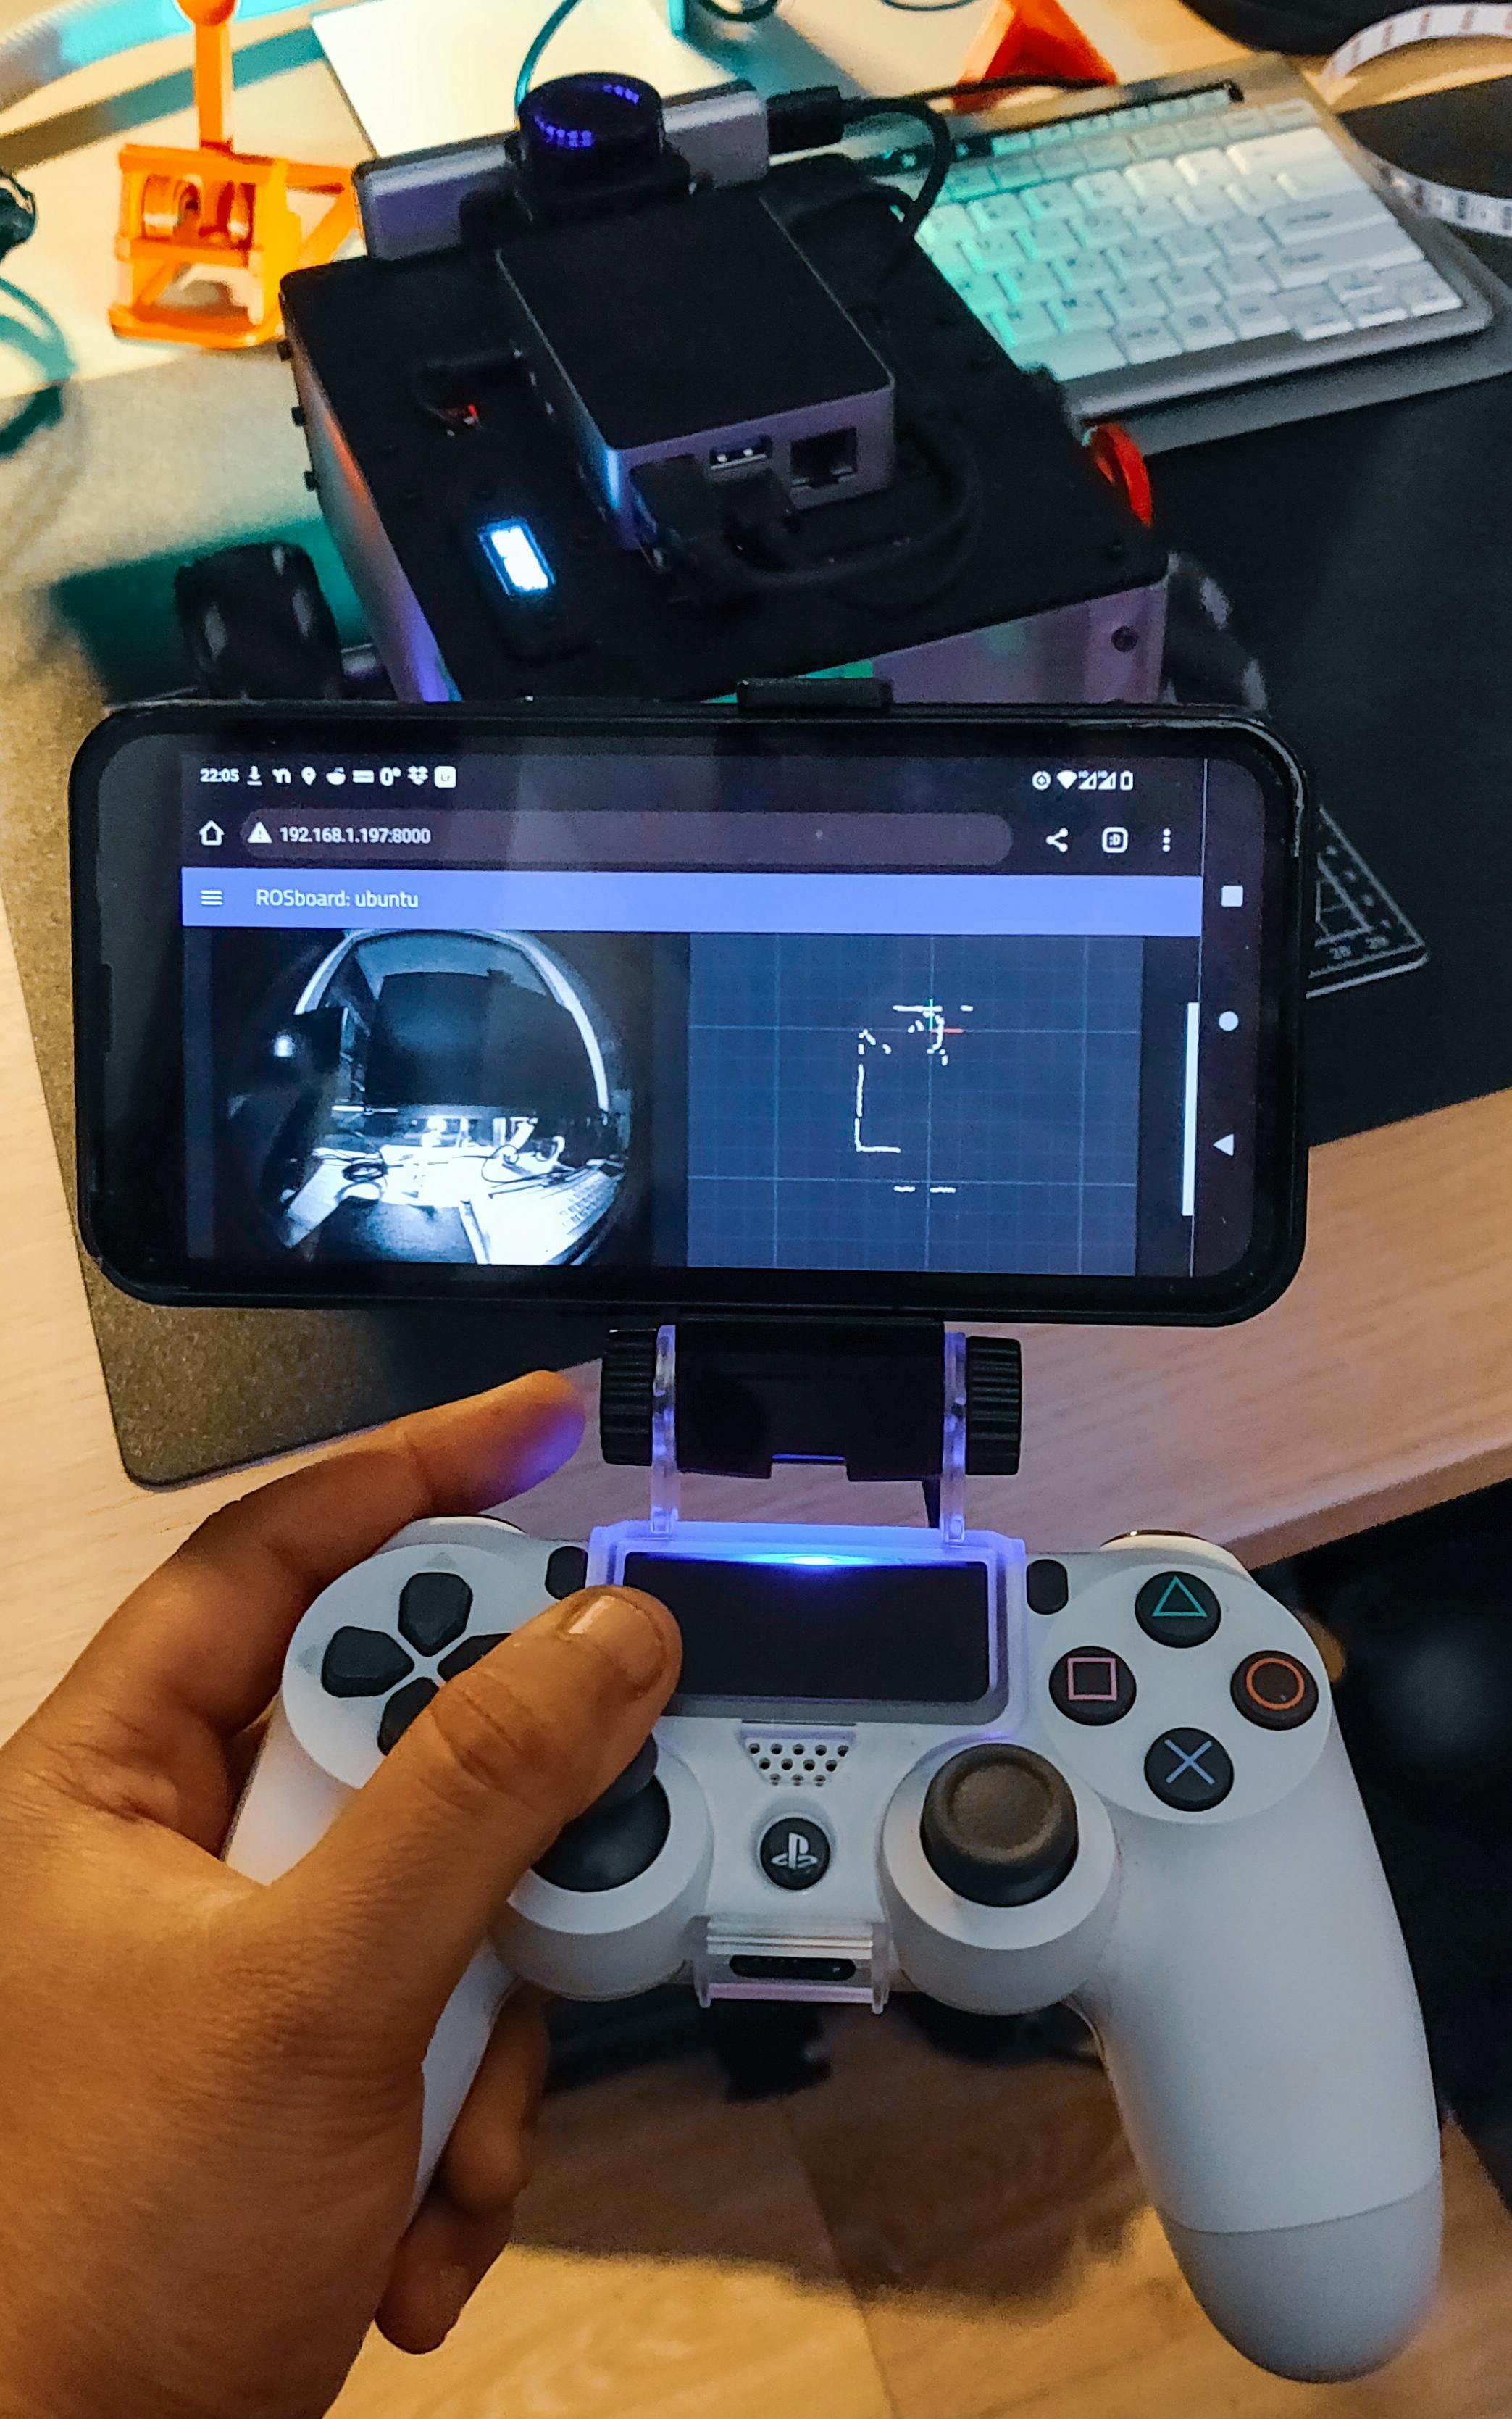
The above image shows one of the uses of the phone holder. Here, I'm using ROSBoard to display one of the two fisheye camera feeds, and the LIDAR scan. I sometimes also use the holder to record videos when I'm driving the robot, like the video below from last week:
Another reason is that I still want to work on ds4_driver and try to fix it, even though I won't be using it anymore. I not only want to see if my suspicion of the RT kernel interfering with the ds4drv driver is true or not, but I also feel bad because these issues started popping up after a significant change that I had contributed. So, I wanted to see it fixed.
Update
Luckily, the maintainer of the package was able to recreate the issue I had created, and fix it to some extent. I tested it out on my setup, and the twist publisher did not die in a while. Seems like the status publish rate was too high, and the issue was resolved once it was limited to 100 Hz. However, both the maintainer and I could only get ~80Hz as a publish rate on average. However, I was still not able to set the LED colors on the controller. I even tried setting the color directly using ds4drv:
$ ds4drv --hidraw --led ff0000
$ ds4drv --led ff0000
But neither of the commands worked. I will try it again when I set up my other RPi with Humble. I will not install the RT kernel there, and I hope that sheds some light on what's going on. The maintainer of the ds4_driver was able to set the LED colors and rumble values on his (Docker) environment. So, I can only assume it works in the normal case.
Next up
Eventually, I want to stop using game controllers entirely. I've been meaning to buy a Nintendo Switch and will be doing so soon. I'm mainly doing it to play Hogwarts Legacy, but I also intend to install Ubuntu and ROS 2 on it. I just want to make sure which versions can run Ubuntu, and choose what to get accordingly.
For the next weekend, I plan on fixing the parameter server on micro-ROS. This will enable me to set PID constants at runtime and re-tune the controllers. I also want to set up tracing for ROS 2 and micro-ROS.
Now, I want to finish reading my book for the month. I am planning on reading one book per month in 2023, and have been successful so far (I read this one for January).